How to configure SSO with Google
This feature requires HTTPS to work.
Since version 4.0.0, Passbolt Pro Edition supports SSO with Google via Google Cloud Identity.
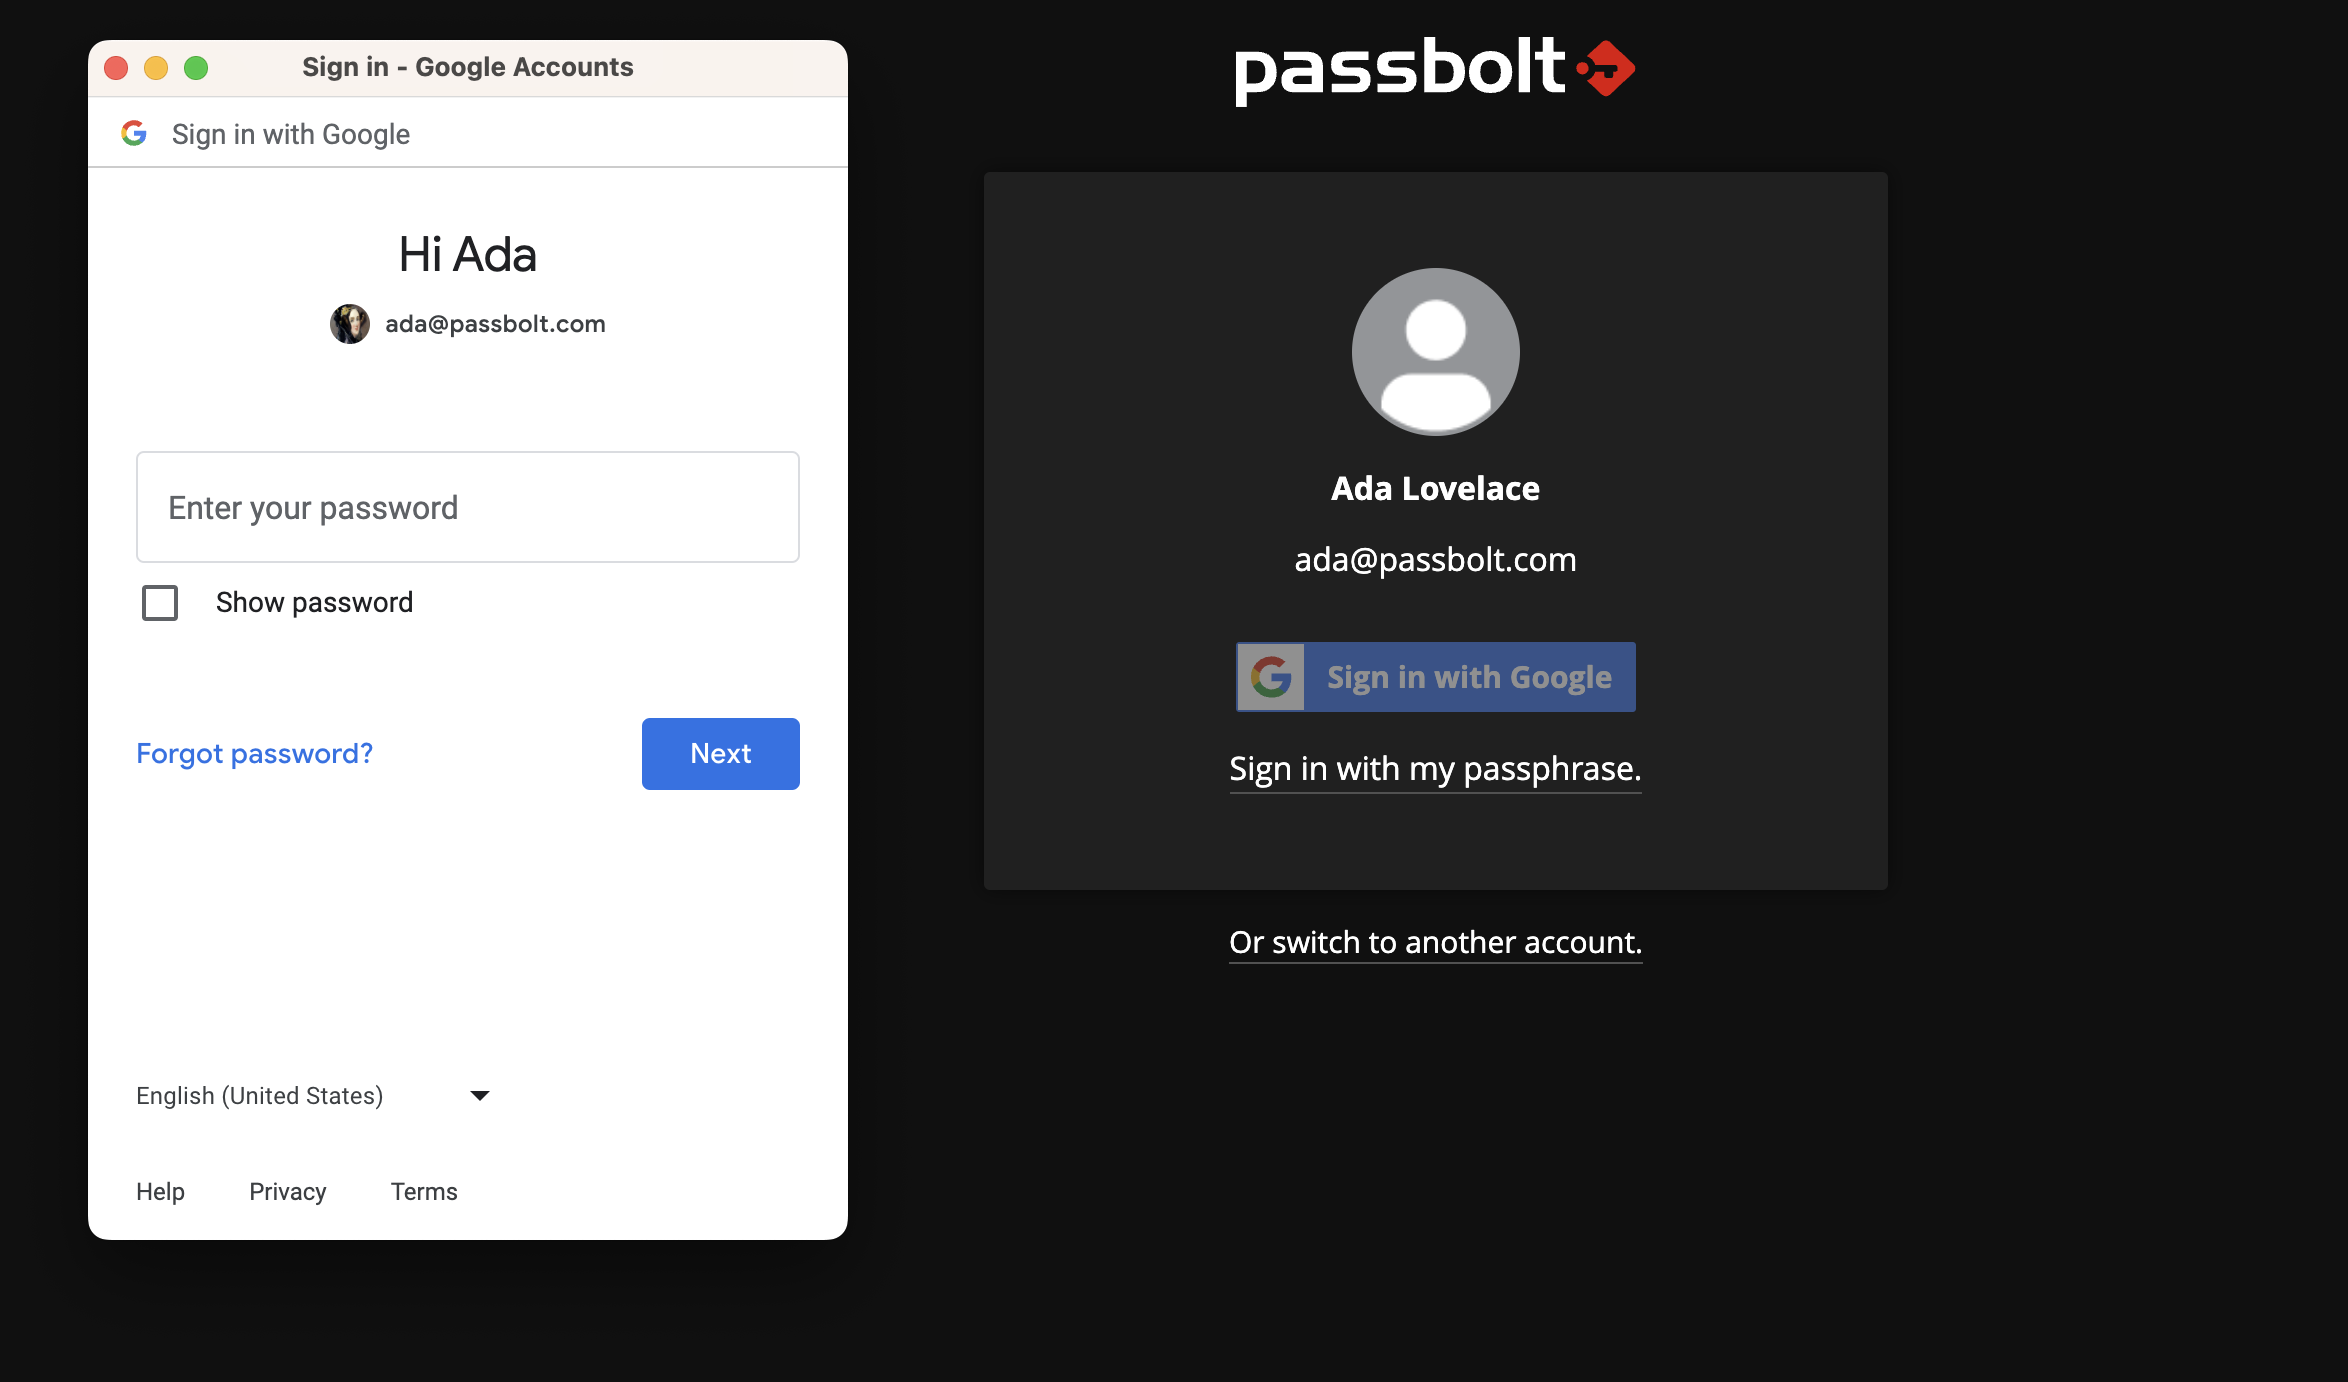
Passbolt will request a Google API for authorization, if you have firewall rules setup, you have to allow your server to request the accounts.google.com domain.
How does it work?
In short Passbolt SSO leverages Google OAuth2/OpenID on top of the existing challenge-based authentication. The user by logging in Google unlocks a key stored server side needed to decrypt the secret key passphrase twice encrypted with a non-extractable symetric key stored in the browser extension local storage client side.
To understand which user flows are supported currently, the risk analysis, and how it works in practice please read the developer documentation.
How to configure the plugin?
Email addresses must match exactly between the SSO provider and Passbolt. Users can only sign in with SSO if their email address exists in both systems.
Open both the Google API console and Passbolt:
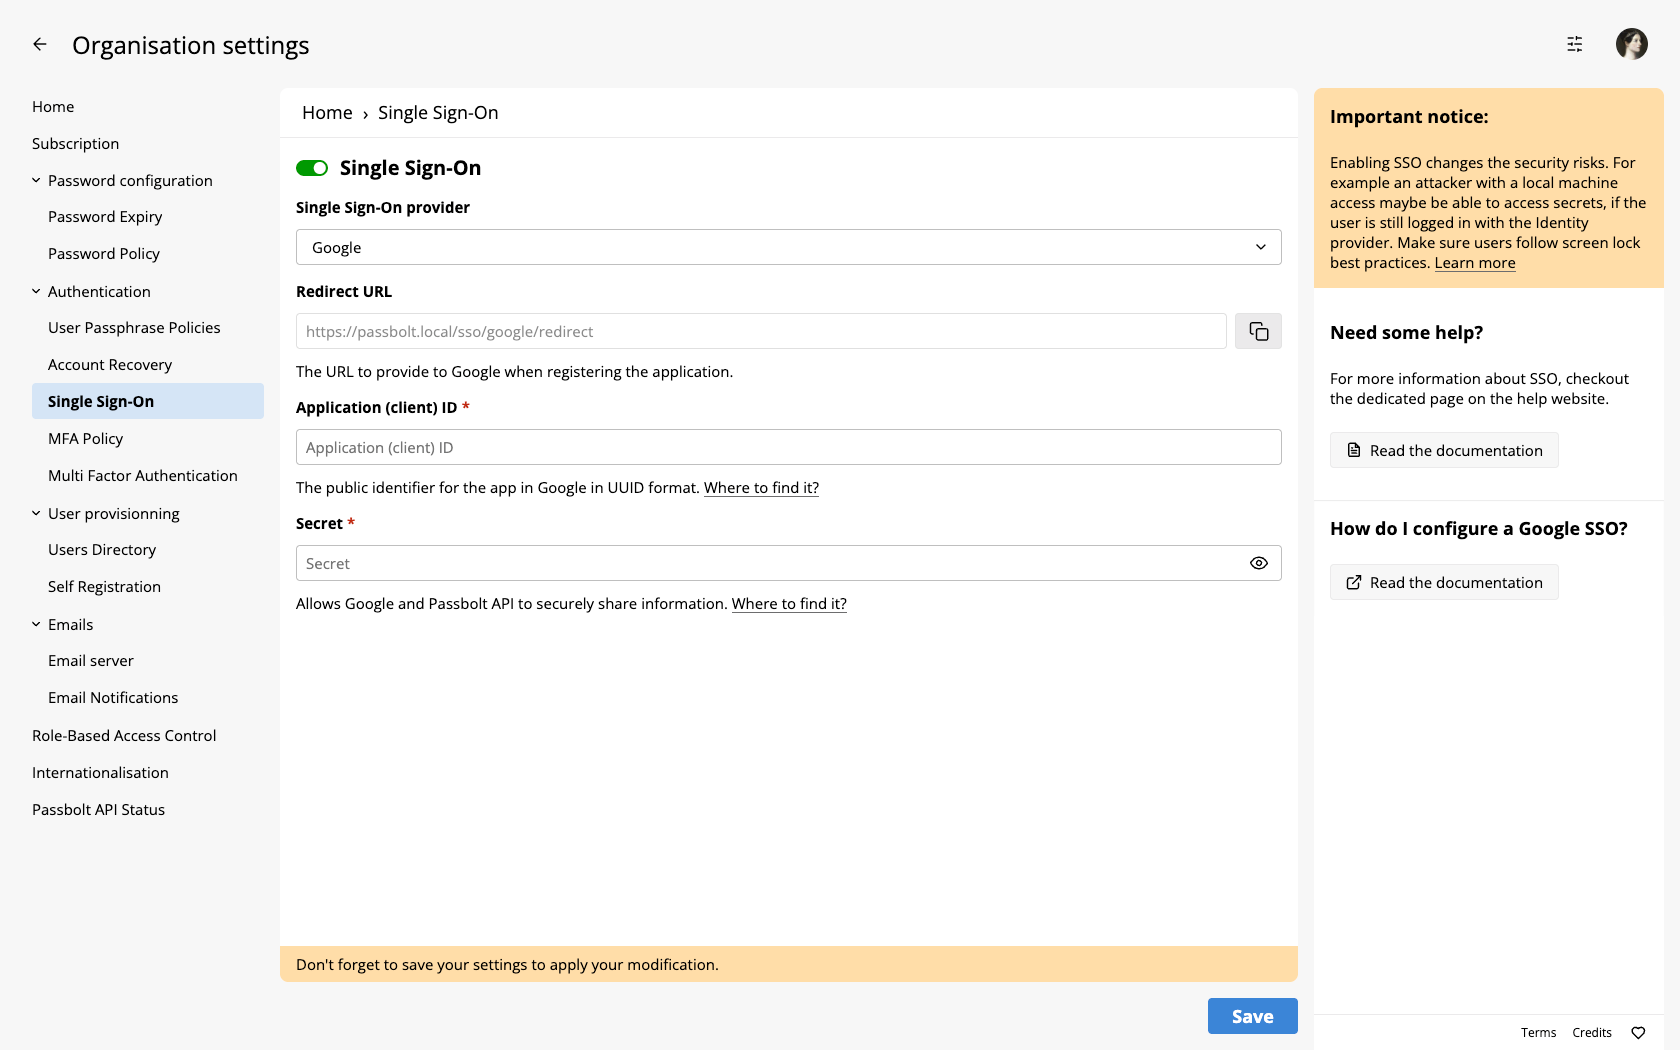
Once the plugin is enabled you will need to go the administration section of your Passbolt instance and then to the "Single Sign On" section.
You will need to also login to the Google API console.
With Passbolt v4.0.0, SSO users can self-register themselves if self registration plugin is enabled. Which means that if one of your users is not yet configured in the browser, he can use SSO to self-register. If self registration plugin is not enabled, you must ensure users are present both in Passbolt and Google Cloud, the email is used to correlate accounts.
- Users that are not present in Google Cloud but are present in Passbolt will not be able to use SSO (a message on google side will be shown).
- Users that are not present in Passbolt but are present in Google Cloud will not be able to login in Passbolt (a message on Passbolt side will be shown).
- If self registration is enabled, users that are not present in Passbolt but are present in Google Cloud will be able to self-register in Passbolt (a message on Passbolt side will be shown).
Configure Google SSO
Navigate to your project lists, click on "New project" button
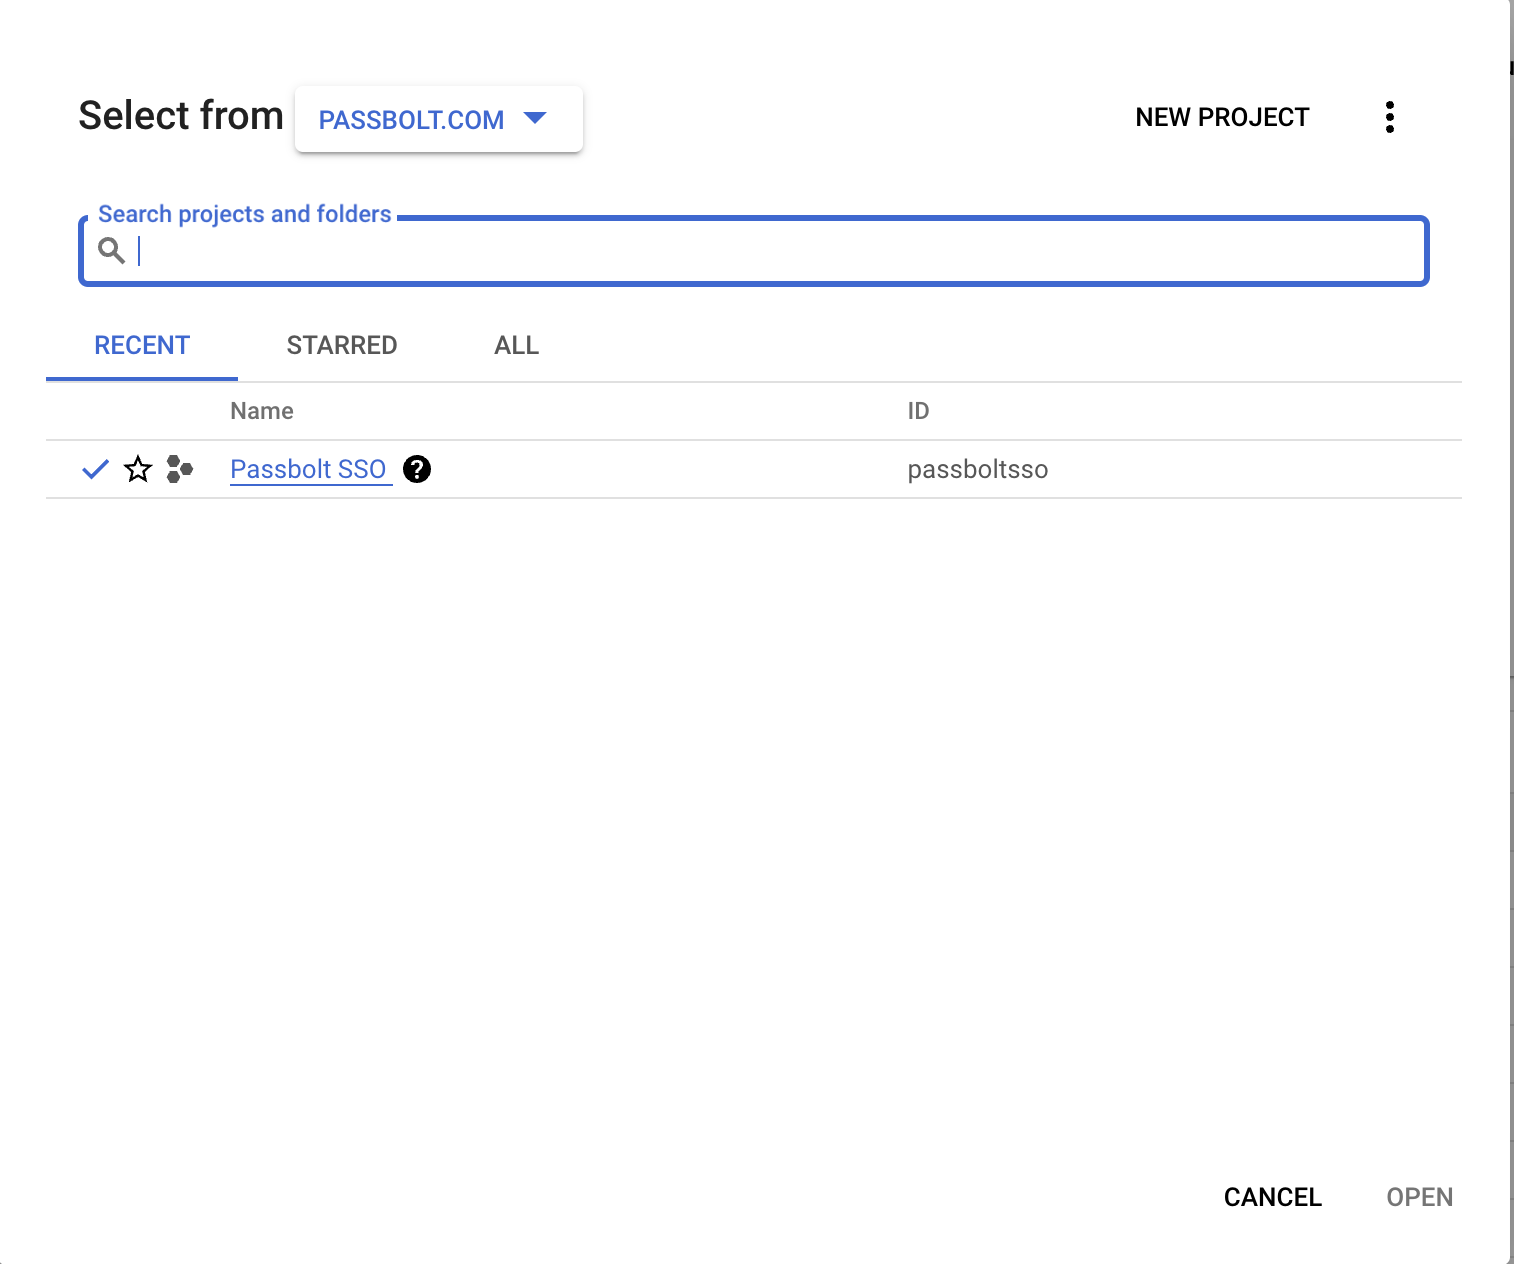
In the new project screen, you will be prompted to enter a project name, you can edit the project ID or accept the default one, select an organization and the location. After that, click on "Create" button to create the project, it should appear in your project list as shown above.
Set up OAuth
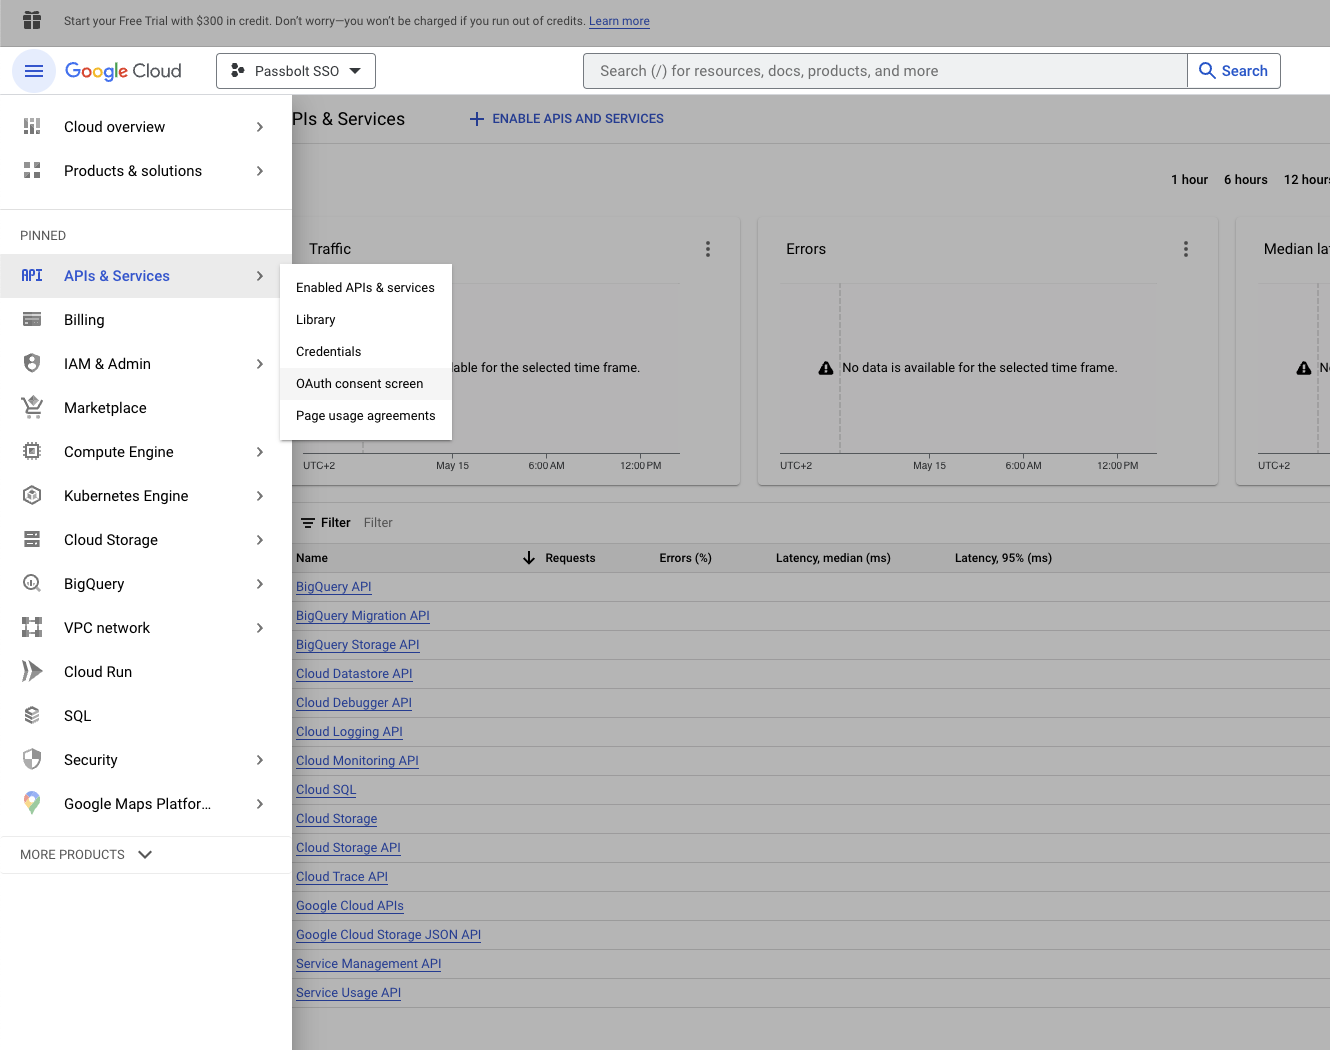
Once the project is create, navigate to APIs & Services > OAuth consent screen
On this page, choose the user type to "Internal" and click the "Create" button. Read more about user type
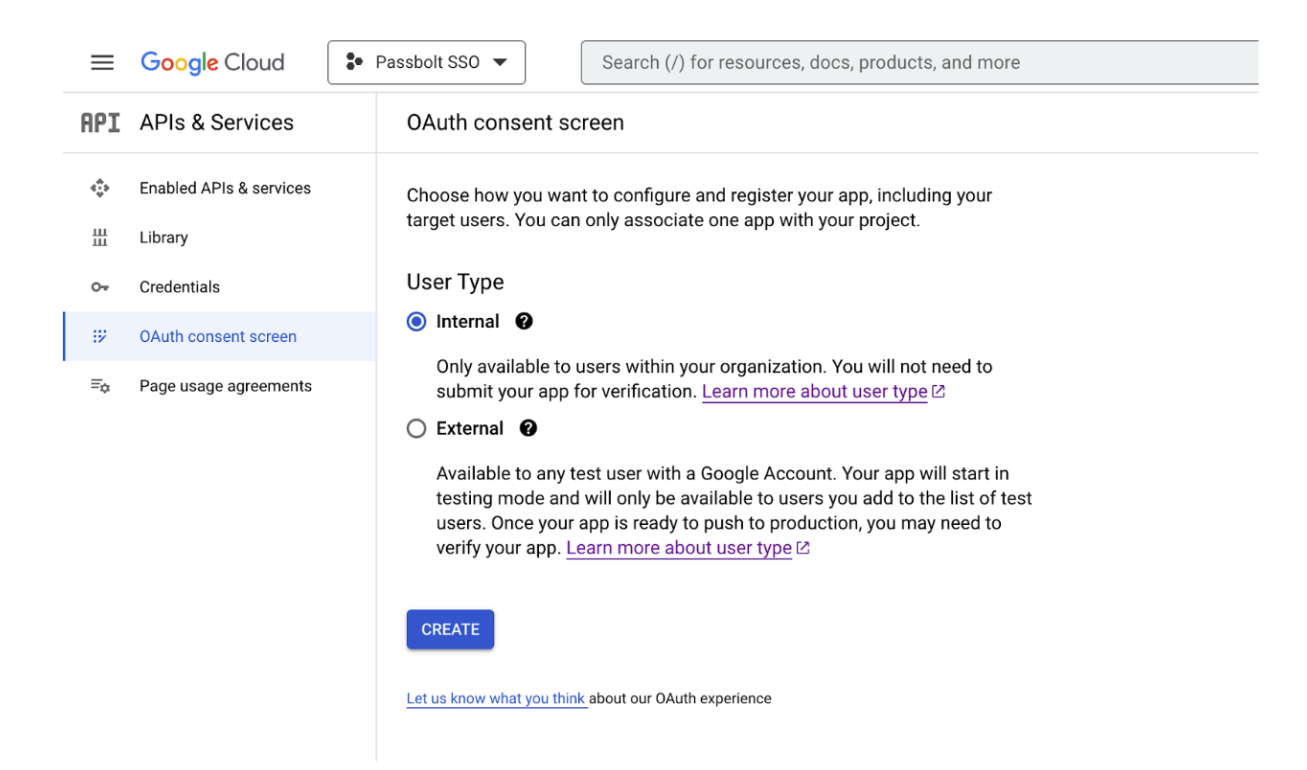
As the name suggests, the "Internal" type app will only be available to users within your organization. However selecting "External" might work, we do not recommend it to use with Passbolt as it can let any user with a valid google account can sign-in to Passbolt.
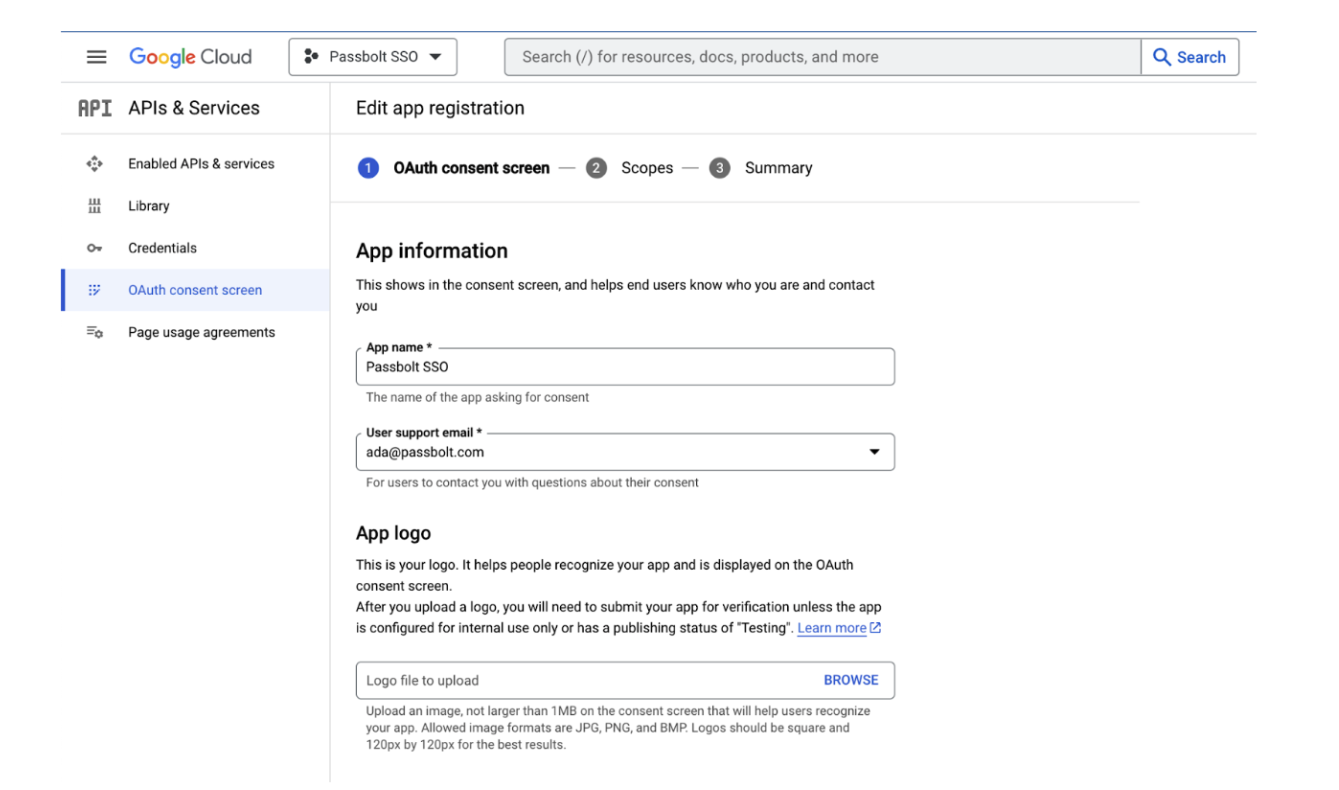
- Fill in required fields like App name, support email, and developer contact information and click the "Save and continue" button. You can also fill in the details of optional fields if you want.
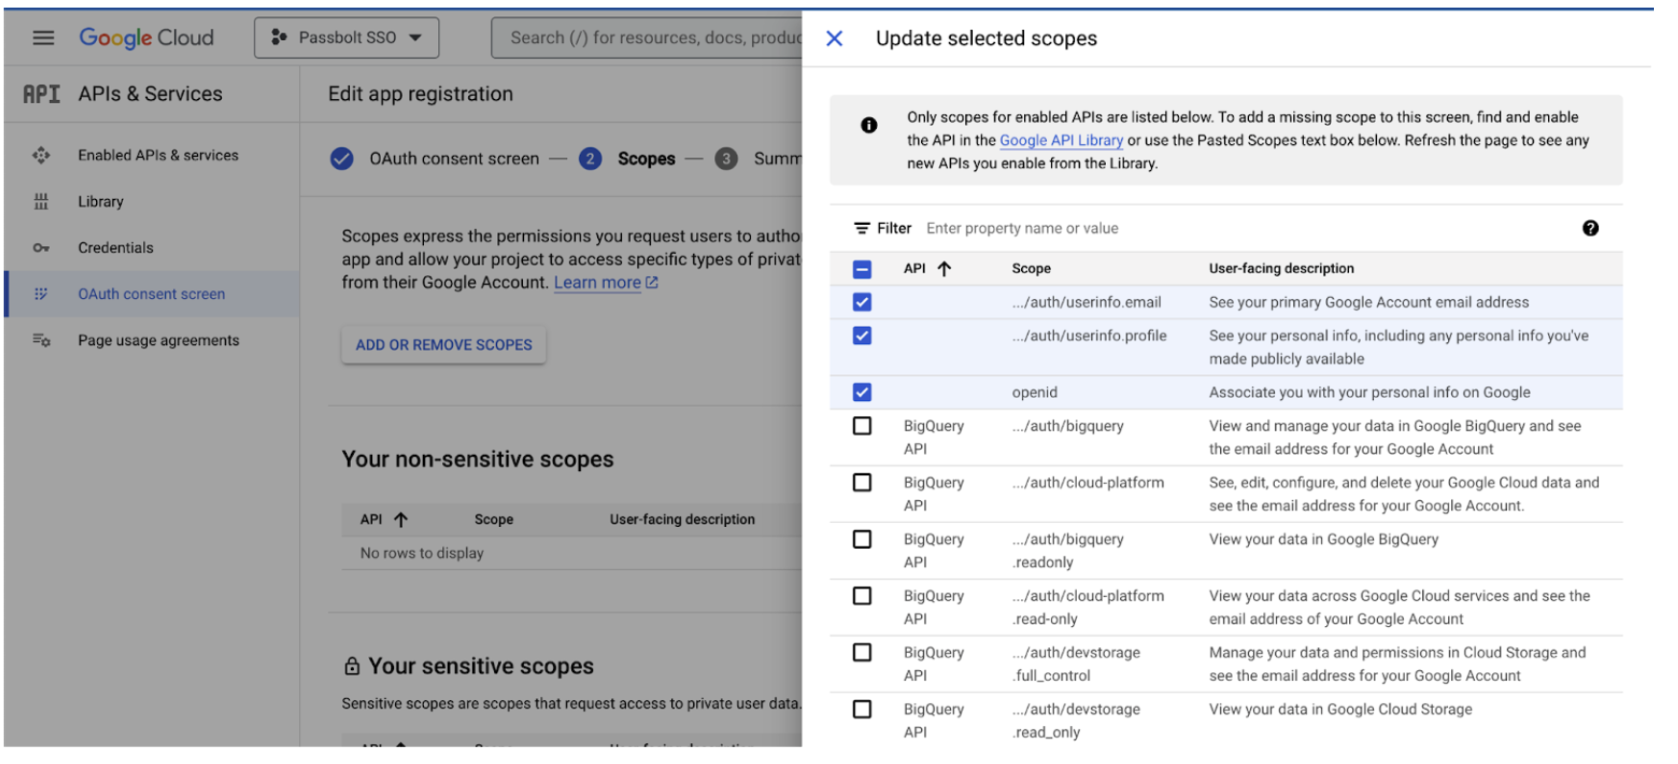
- On the Scopes page, you must have to select these three scopes:
- auth/userinfo.email
- auth/userinfo.profile
- openid
Once it is done, click on "Save and continue" to go to the next screen.
- Verify and submit the summary of the details you selected.
Create credentials
Navigate to APIs & Services > Credentials and click on Create credentials > OAuth client ID.
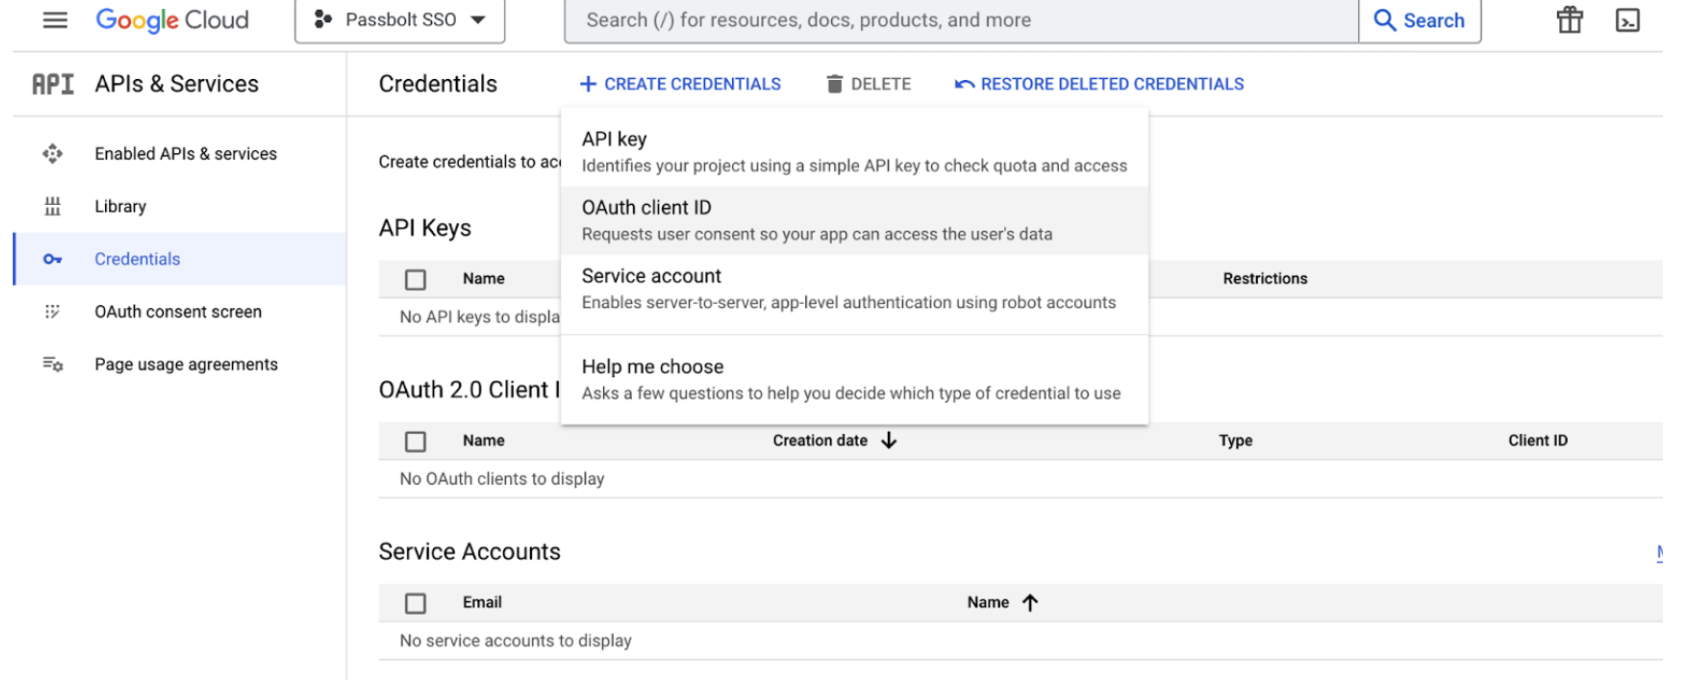
On the Create OAuth client ID screen, select Application type to "Web application", then enter the name of your choice, Authorized Javascript origins, Authorized redirect URIs (You can get this from the Passbolt SSO settings page).
Once you've entered all the details click on the "Create" button to create the credentials.
When credentials are created, you'll get Client ID and Client secret. These are the two things you'll need to add to Passbolt when you configure the Google SSO.
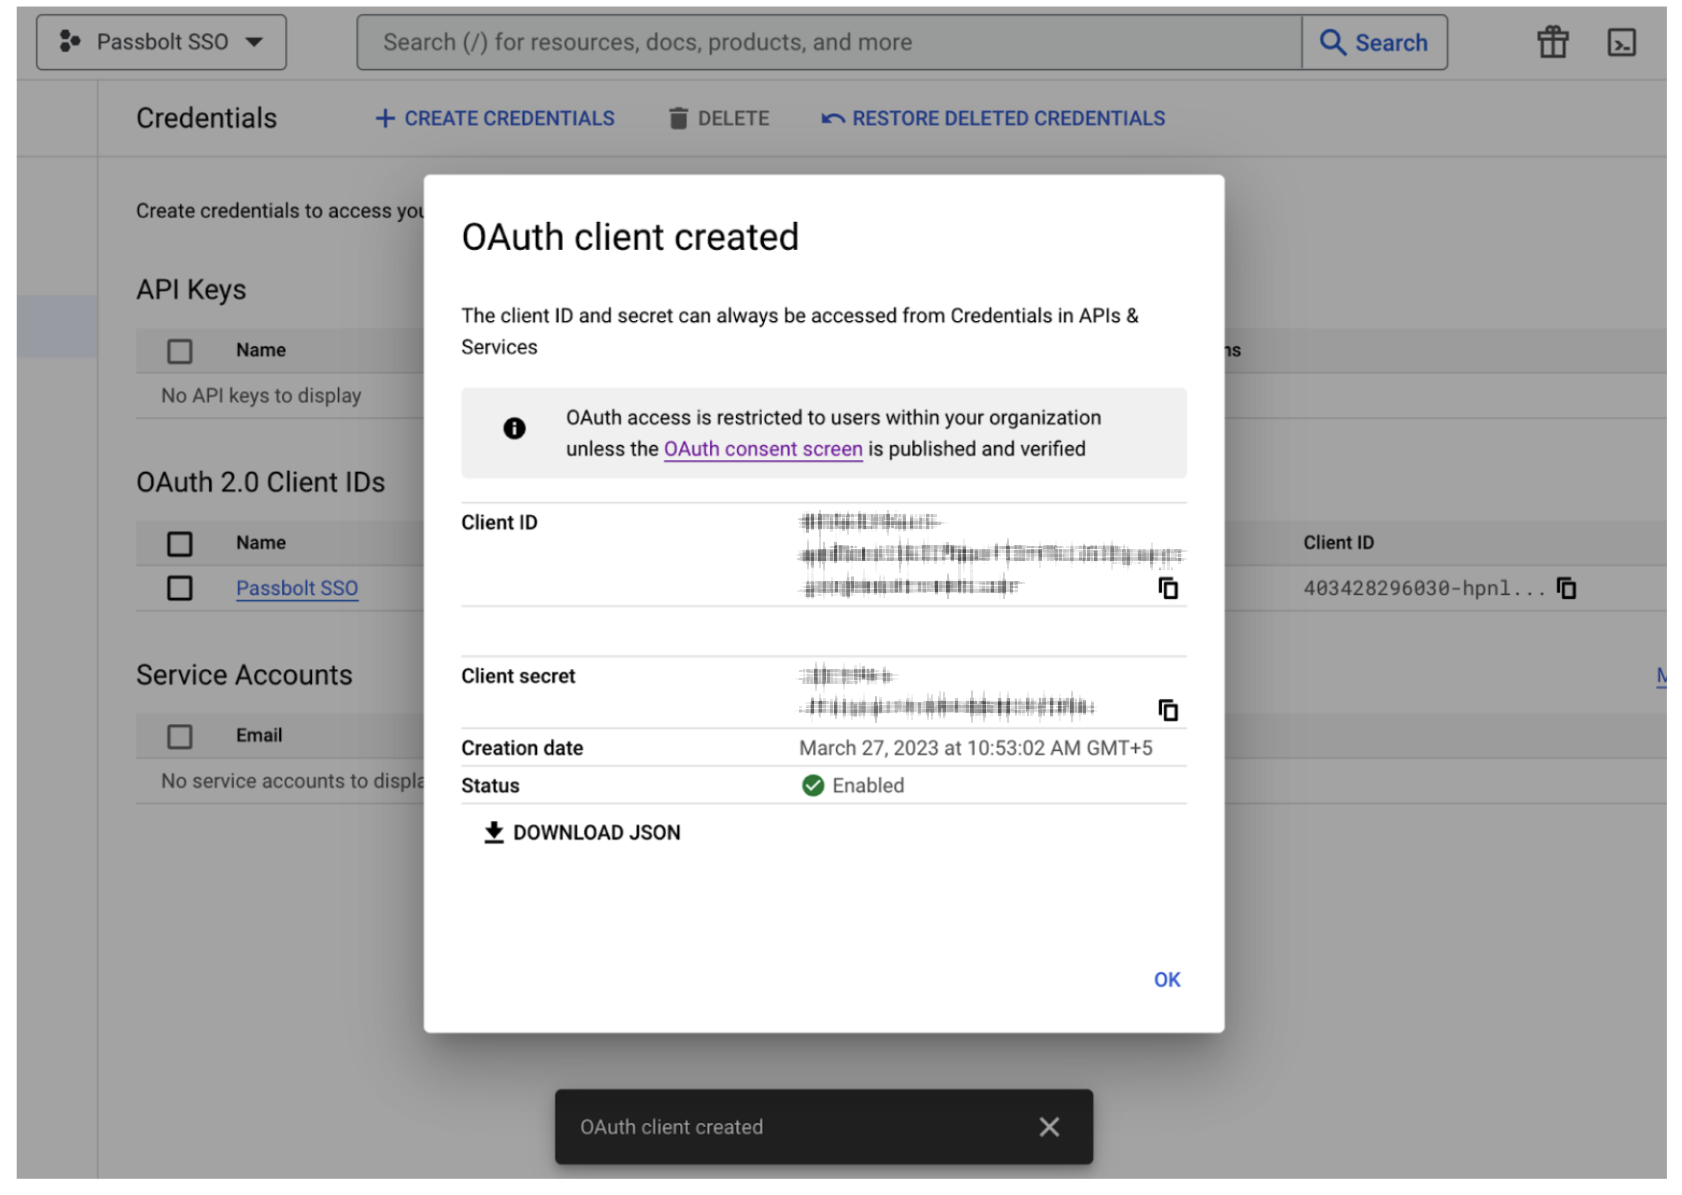
The Authorized redirect URIs should be the URL given by the passbolt while configuring SSO from administration (https://your-domain.com/app/administration/sso). Google can accept any valid URL in redirect URLs but it might not work with passbolt.
Configure SSO through the GUI
To finish the configuration, navigate to Administration > Single Sign On
Fill the fields with what we created, such as:
- Application ID
- Secret
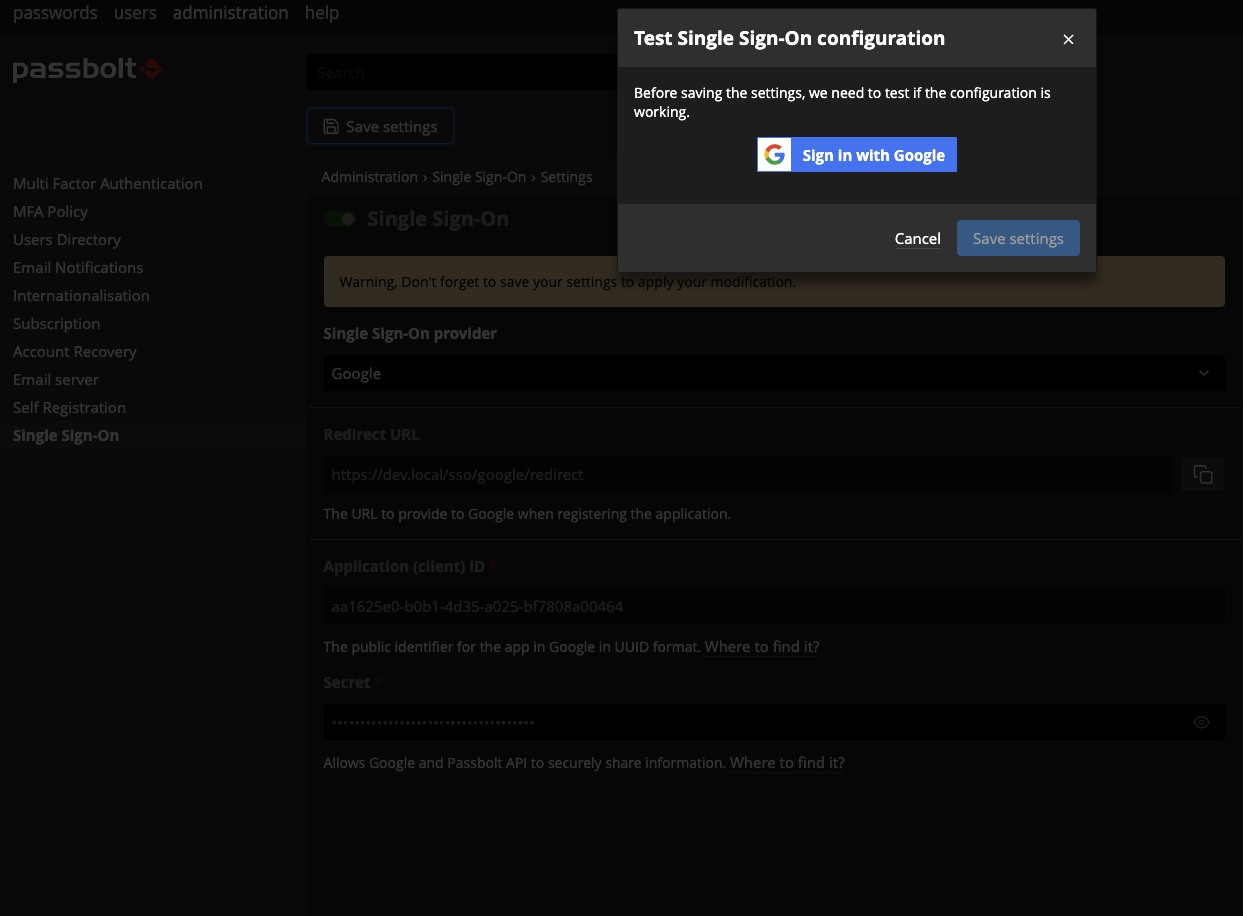
After that, a dialog will open with a "Sign in with Google" button, click on it. A popup will open asking you to perform the authentication with Microsoft, once the authentication is successful you can save the settings. Once the settings have been saved, you can log out and you should see an SSO option.
Users must successfully perform a login using their current passphrase after SSO has been activated in order for the SSO option to be proposed to them at future logins.