Passbolt API Status
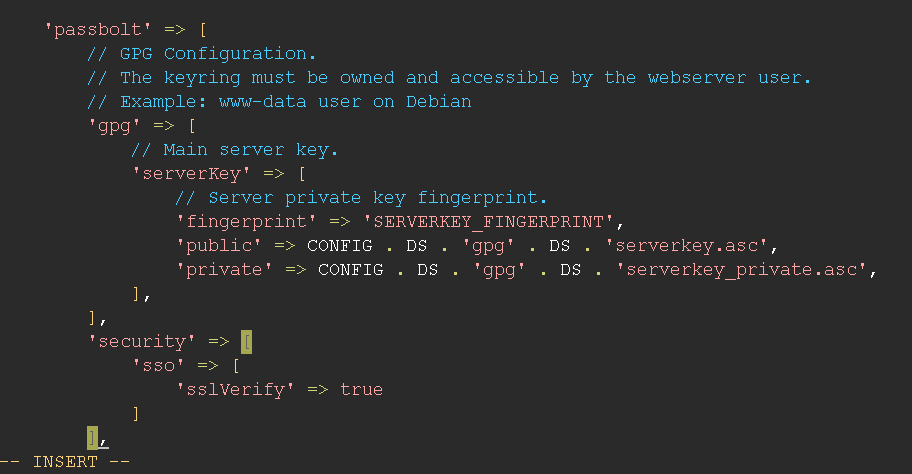
Since Passbolt v4.6, it is now possible for both Passbolt PRO and Passbolt CE to run the healthCheck from the user interface in Administration > Passbolt API Status.
Color-coded legend
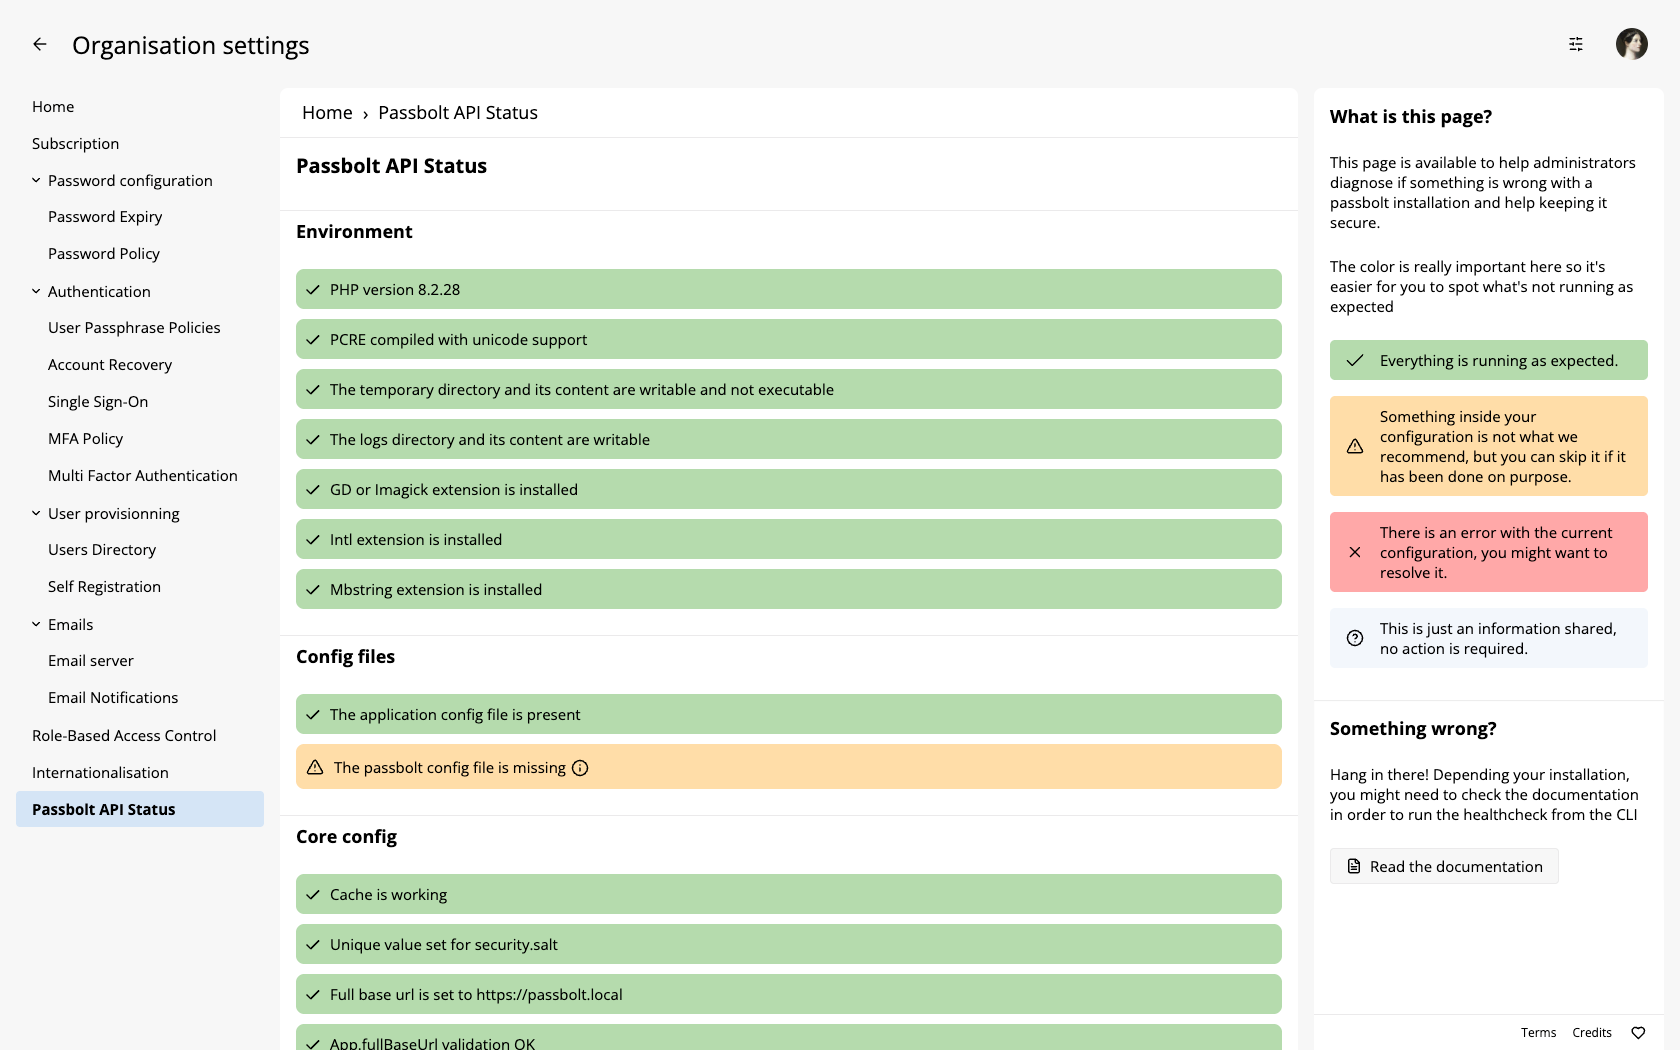
You will see on the right side that we've introduced a color-coded legend.
- Green: OK ✅
- Orange: OK after ensuring it is 🔍
- Red: Something is not OK. 🚨
- Blue: This is just for information. ✏️
What could trigger an error?
Environment
These checks are related to the environment itself e.g. PHP version, PHP module, etc.
Kernel
The kernel version check ensures that your system is running a modern and stable Linux kernel. A recent and maintained kernel version helps provide security updates, bug fixes, and compatibility with required software dependencies.
System architecture
This checks whether your system is running on a 64-bit architecture. A 64-bit system provides better performance, allowing full compatibility with PHP and GPG requirements.
PHP Version
It helps to ensure you are not running an unsupported PHP version. It should be green if you are running PHP > 8.2 as it is the minimum version recommended to run Passbolt.
However, with the upcoming Passbolt v5, if you are still on PHP 7.4 we recommend migrating to a new server already to ensure a smooth future update.
Gnupg Version
The software relies on gnupg for cryptographic operations, such as key management and encryption. Ensuring that you are running an up-to-date version of GPG is essential for security and performance.
PCRE
You should not face any compiling issues with PCRE by default, however if PCRE has not been completed with unicode support, while reconfiguring you should add:
--enable-unicode-properties
Temporary directory
The temporary directory and its content should be writable and not executable, if you see some errors you should ensure that the temporary directory and its content are writable by the webserver user.
The location and the webserver user will depend on the distribution, for this example it uses Debian. You might want to change www-data to nginx if you are using a RPM distribution.
sudo chown -R www-data:www-data /var/lib/passbolt/tmp
sudo chmod -R 775 $(find /var/lib/passbolt/tmp -type d)
sudo chmod -R 664 $(find /var/lib/passbolt/tmp -type f)
Logs directory
The logs directory and its content have to be writable, if you see some error there is a high chance that it is not the case yet.
The location and the webserver user will depend on the distribution, for this example it uses Debian. You might want to change www-data to nginx if you are using a RPM distribution.
sudo chown -R www-data:www-data /var/log/passbolt
sudo chmod -R 775 $(find /var/log/passbolt -type d)
sudo chmod -R 664 $(find /var/log/passbolt -type f)
GD or Imagick
GD or Imagick module have to be installed in order for passbolt to manipulate images. If you have some errors with this check, you can take a look at this documentation
Intl
The Intl module is needed for the internationalisation. If you have any error with this check, you should take a look this documentation
Mbstring
Mbstring is designed for safe and efficient handling of multibyte strings, allowing passbolt to work with textual data in various encodings. If you encounter some errors related to this module, you can take a look at this documentation
NTP
The server requires accurate system time for cryptographic operations and security measures. If the system clock is not synchronized, it may lead to authentication errors, expiration issues, and other unexpected behavior.
If the check fails, it means that NTP could be inactive, and your system clock may not be synchronized. You can take a look at our dedicated documentation for that.
Config Files
If you are on Docker or Helm, you should not manually iterate on the configuration files. Restarting the container or the pod should resolve the file conflicts except if they have been mounted.
This section is there to ensure that both application and passbolt configuration file are present.
Application Configuration File
This file is critical for the application, if it is missing, you should do a copy of the default file.
sudo cp /etc/passbolt/app.default.php /etc/passbolt/app.php
Passbolt Configuration File
This is the passbolt configuration file, it is needed to ensure that passbolt have been completely configured.
sudo cp /etc/passbolt/passbolt.default.php /etc/passbolt/passbolt.php
Core config
These verification are for the basic application settings, such as URL and security configurations, are properly set and operational.
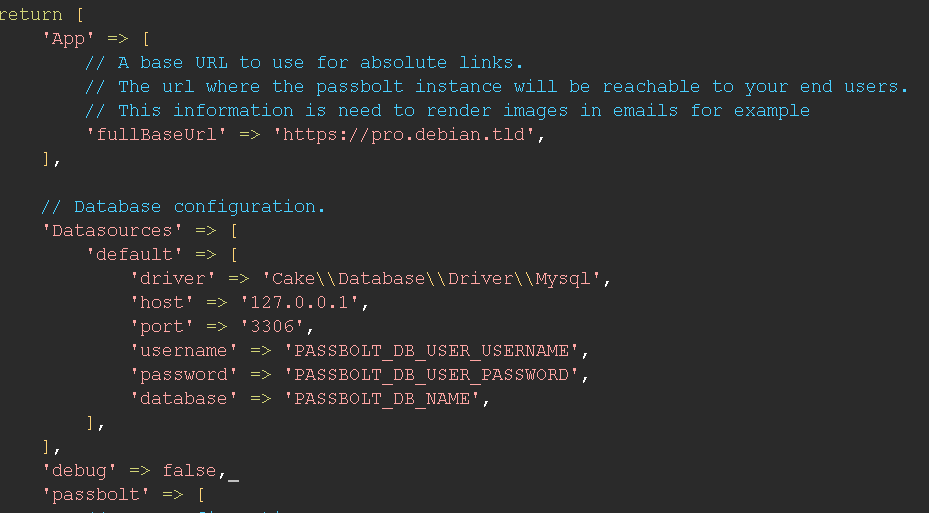
Debug mode
We highly not recommend to use the debug mode on a prod or pre-prod environment. If you see Debug mode is on, update the configuration file in /etc/passbolt/passbolt.php and set debug to false.
Cache
It verifies that the cache mechanism is working, this can help with performances issues. If the cache is somehow not working, you should consider taking a look at the settings in /etc/passbolt/app.php
Unique value for security.salt
It helps to ensure that the security.salt value used for the hash is unique and correctly configured. If you have any error you will need to edit the security.salt in /etc/passbolt/app.php
Full Base URL
If you are on Docker or Helm, you will need to set the APP_FULL_BASE_URL environment variable.
Helps to confirm that the fullBaseUrl is defined, if it is not defined yet, you will need to edit App.fullBaseUrl in /etc/passbolt/passbolt.php

Full Base URL validation
It checks that the fullBaseUrl is correct and match the expectation, if there is any error with the validation here is the two things you might want to do:
- Edit
App.fullBaseUrlin /etc/passbolt/passbolt.php - Select a valid domain name as defined by section 2.3.1 here
Healthcheck Status
It checks that the status url is reachable. If you have any error with this check, the good news is that this warning should not limit you for running passbolt, however, in order to get rid of this warning, you will need to ensure a few things:
App.fullBaseUrlis correct inside /etc/passbolt/passbolt.php or with the environment variableAPP_FUL_BASE_URLif you are on Docker or Helm.- The server is able to ping the domain with
ping YOUR_DOMAIN
If the server is not able to ping the domain, this might the cause of the issues, you will need to edit the /etc/hosts file and add the domain resolution.
127.0.0.1 YOUR_DOMAIN
TLS Certificate
These checks verify that the TLS certificate is valid and correctly configured to secure communications.
Peer certificate
This check helps to ensure that the certificate is still valid, if this check is failing there is three potential reasons:
- The certificate is expired
- It's a self-signed certificate that is not trusted on the server.
- It's a wildcard certificate
Since the certificate is not validating the hostname when using a wildcard, we are throwing an error but if you are confident with the certificate and your configuration, you can consider this as a false negative.
The location of the trusted certificated depends on the distribution, for this example it uses Debian.
In order to trust the certificate on the server, you will need to create a cert.crt file which contain the chain of trust of the certificate (more information available here) and move this file in /usr/share/ca-certificates
sudo cp cert.crt /usr/share/ca-certificates/cert.crt
sudo dpkg-reconfigure ca-certificates
Then you will see three options, we recommend choosing ask and manually approve the imported certificate.
The domain resolution should be also completed in /etc/hosts/ file
127.0.0.1 YOUR_DOMAIN
Hostname
It verifies that the hostname from the certificate match App.fullBaseUrl in /etc/passbolt/passbolt.php or the environment variable APP_FULL_BASE_URL
Self-signed certificate check
It helps to identify if you are using a self-signed certificate or not, this is likely a warning and should not be considered as a failure if you are confident with your certificate configuration.
Database
The database checks ensure that the application can connect to the database and that the necessary tables and default content are present.
Connection to the database
If you are on Docker or Helm, you might want to double-check the values for DATASOURCES_DEFAULT_*. More information available here
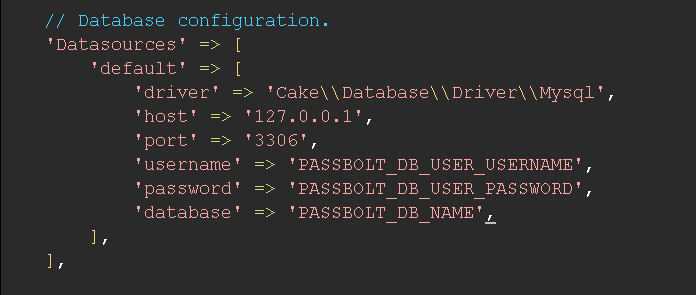
It helps to ensure that the application is able to connect to the database. If you encounter some issues with this check, there is a few potentials reasons:
- Ensure that the driver defined for
Datasources.default.driverin /etc/passbolt/passbolt.php is one of the following:- 'Cake\Database\Driver\Mysql'
- 'Cake\Database\Driver\Postgres'
- Double-check that the database credentials for
Datasources.defaultin /etc/passbolt/passbolt.php - Make sure that the database exists and is accessible for the given database user
- Make sure that the database is reachable from the server
Numbers of table
It checks that the necessary tables exists in the database. If there is any error with this checks, you should run the installation scripts to install the database tables.
The webserver user will depend on the distribution, for this example it uses Debian. You might want to change www-data to nginx if you are using a RPM distribution. If you are on Docker or Helm, restarting the container or the pods should work.
sudo su -s /bin/bash -c "/usr/share/php/passbolt/bin/cake passbolt install" www-data
Default content
Ensure that default content are present in the database. If there is any error, you should consider running the installation script ot install the database tables.
The webserver user will depend on the distribution, for this example it uses Debian. You might want to change www-data to nginx if you are using a RPM distribution. If you are on Docker or Helm, restarting the container or the pods should work.
sudo su -s /bin/bash -c "/usr/share/php/passbolt/bin/cake passbolt install" www-data
GPG Configuration
These checks helps to confirm the correct setup and functionality of GPG keys used for encrypting and signing messages. This is critical for Passbolt to work properly.
GPG Module
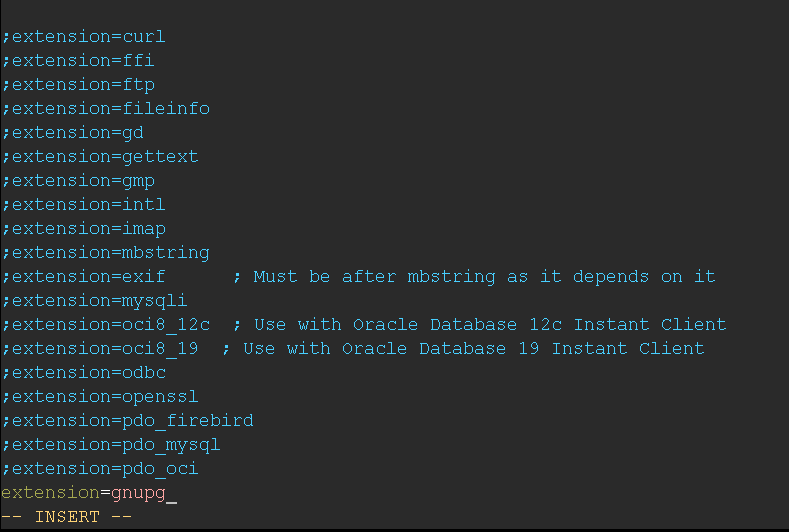
It ensure that the GPG module for PHP is installed and loaded, if it is not the case and you are seeing an error there is two things to be considered.
- Install php-gnupg
- Make sure to add
extension=gnupgin the /path/to/php.ini configuration files for both php-cli and php.
GNUPGHOME
This check helps to verify that the variable GNUPGHOME is set and point to the right directory. If you have any errors, you should ensure the keyring location exists and is accessible by the webserver user.
The webserver user and the keyring location will depend on the distribution, for this example it uses Debian. You might want to change www-data to nginx if you are using a RPM distribution.
sudo mkdir -p /var/lib/passbolt/.gnupg
sudo chown -R www-data:www-data /var/lib/passbolt/.gnupg
sudo chmod 700 /var/lib/passbolt/.gnupg
You can also change the location of the keyring by editing the GPG.env.setenv and GPG.env.home variable in /etc/passbolt/passbolt.php.
GPG Keyring
It helps to ensure that the keyring is writable by the webserver, if you face any error please consider running these commands
The webserver user and the keyring location will depend on the distribution, for this example it uses Debian. You might want to change www-data to nginx if you are using a RPM distribution.
sudo mkdir -p /var/lib/passbolt/.gnupg
sudo chown -R www-data:www-data /var/lib/passbolt/.gnupg
sudo chmod 700 /var/lib/passbolt/.gnupg
Server Public Key
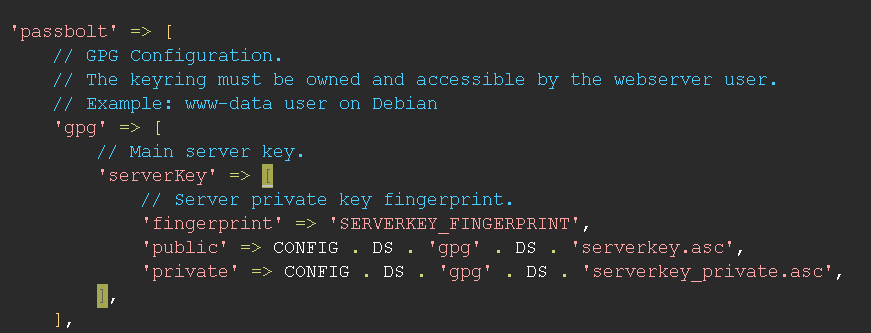
It helps to ensure that the server public key is defined and readable. If you face any error there is few potentials things to do:
- Ensure the public key file is defined by the variable
passbolt.gpg.serverKey.publicin /etc/passbolt/passbolt.php - Ensure there is a public key armored block in the key file.
- Ensure the public key defined in /etc/passbolt/passbolt.php exists and is accessible by the webserver user.
Server Private Key
It helps to ensure that the server private key is defined and readable. If you face any error there is few potentials things to do:
- Ensure the private key file is defined by the variable
passbolt.gpg.serverKey.privatein /etc/passbolt/passbolt.php - Ensure there is a private key armored block in the key file.
- Ensure the private key defined in /etc/passbolt/passbolt.php exists and is accessible by the webserver user.

Server Key Fingerprint
It checks that the fingerprint from the server key match the one defined in the configuration file or environment variable. If you face any errors double-check the key fingerprint.
The webserver user and the keyring location will depend on the distribution, for this example it uses Debian. You might want to change www-data to nginx if you are using a RPM distribution.
sudo su -s /bin/bash -c "gpg --list-keys --fingerprint --home /var/lib/passbolt/.gnupg" www-data | grep -i -B 2 SERVER_KEY_EMAIL
Replace SERVER_KEY_EMAIL with the email you've used when you generated the server key.
Server key in the keyring
It checks that the server public key is present in the keyring. If it is not in the keyring, you should import the private server key in the keyring of the webserver user.
The webserver user and the keyring location will depend on the distribution, for this example it uses Debian. You might want to change www-data to nginx if you are using a RPM distribution.
sudo su -s /bin/bash -c "gpg --home /var/lib/passbolt/.gnupg --import /etc/passbolt/gpg/serverkey_private.asc" www-data
Server Email Id
This will ensure that the emailId related to the server keys is valid, if there is an error please edit or generate another key with a valid emailId.
Encryption check for Public Key
Checks that the server public key can be used to encrypt a message, if there is any issues with this check there is multiple things to consider:
- Make sure that the server private key is valid and that there is no passphrase.
- Make sure you imported the private server key in the keyring of the webserver user.
The webserver user will depend on the distribution, for this example it uses Debian. You might want to change www-data to nginx if you are using a RPM distribution. If you are on Docker or Helm, restarting the container or the pods should work.
sudo su -s /bin/bash -c "gpg --home /var/lib/passbolt/.gnupg --import /etc/passbolt/gpg/serverkey_private.asc" www-data
Signing check for Public Key
This check help to ensure that the server public key can be used to sign a message, if there is any issues with this check there is multiple things to consider:
- Make sure that the server public key is valid and that there is no passphrase.
- Make sure you imported the public server key in the keyring of the webserver user.
The webserver user will depend on the distribution, for this example it uses Debian. You might want to change www-data to nginx if you are using a RPM distribution. If you are on Docker or Helm, restarting the container or the pods should work.
sudo su -s /bin/bash -c "gpg --home /var/lib/passbolt/.gnupg --import /etc/passbolt/gpg/serverkey.asc" www-data
Encryption and signing check for Private and Public Keys
If you are on Docker or Helm, consider sourcing the environment variable with source /etc/environment
It helps to ensure that both the private key and the public key can be used to encrypt and sign a message, if there is any error with this you might consider generate new keys.
Decryption and verification for Private Key
If you are on Docker or Helm, consider sourcing the environment variable with source /etc/environment
It helps to ensure that the private key can be used to decrypt and verify a message, if there is any error with this you might consider generate new keys.
Verification for Public Key
If you are on Docker or Helm, consider sourcing the environment variable with source /etc/environment
It helps to ensure that the public key can be used to verify a message, if there is any error with this you might consider generate new keys.
Gopengpg compatibility for Public Key
It ensures that the public server key format is compatible with Gopengpg, errors are usually related to the format. Remove all empty new lines above the end block line

Gopengpg compatibility for Private Key
Ensure that the private server key format is compatible with Gopengpg, errors are usually related to the format. Remove all empty new lines above the end block line

Application configuration
These verifications validate various application settings, including SSL enforcement, versioning, and plugin configurations.
Passbolt version
It helps to identify which version are running and if it is the latest version. You could face some errors while having an updated version if the server is in an air gap environment and it could not connect to the passbolt repository to check versions.
If the server is not up-to-date, unless you have an internal good reason, please consider updating to the latest version.
Force TLS (SSL)
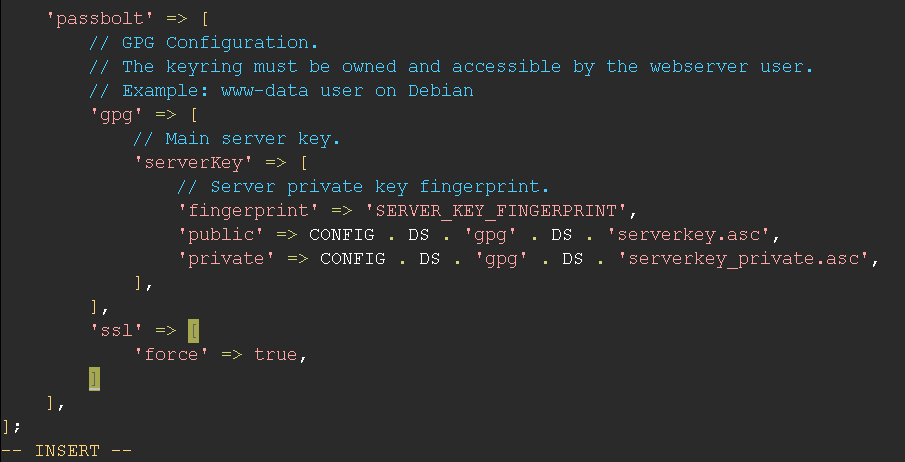
We recommend using TLS (SSL) with Passbolt, this checks verify if passbolt has been configured to force TLS (SSL). If you have this error, you will need to set passbolt.ssl.force to true in /etc/passbolt/passbolt.php
Full Base URL HTTPS
This is verifying if Passbolt is running in HTTPS. If you have an issues and think it is an error please consider checking App.fullBaseUrl scheme in /etc/passbolt/passbolt.php or the environment variable set for APP_FULL_BASE_URL if you are on Docker or Helm.
Selenium API endpoints
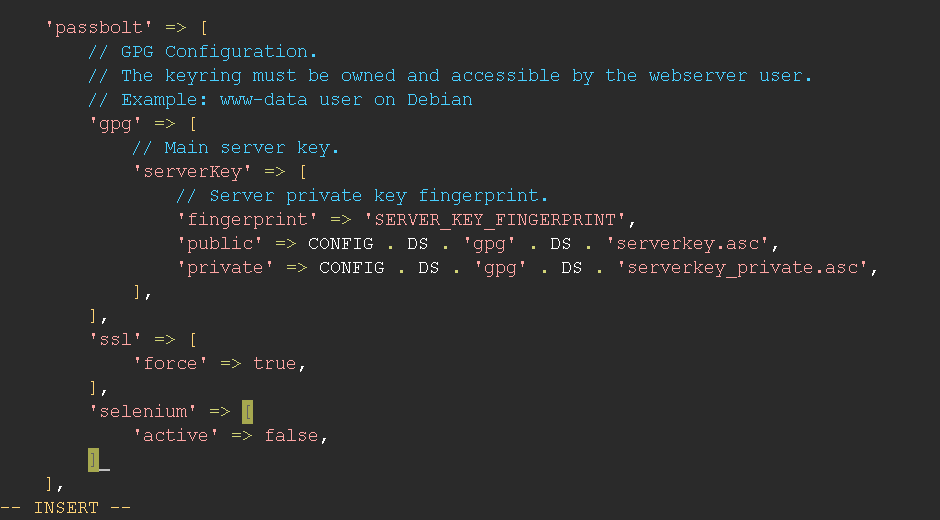
Selenium API endpoints are disabled by default and should remain disabled. This setting should be used for testing only. If you have it enabled, you should set passbolt.selenium.active to false in /etc/passbolt/passbolt.php.
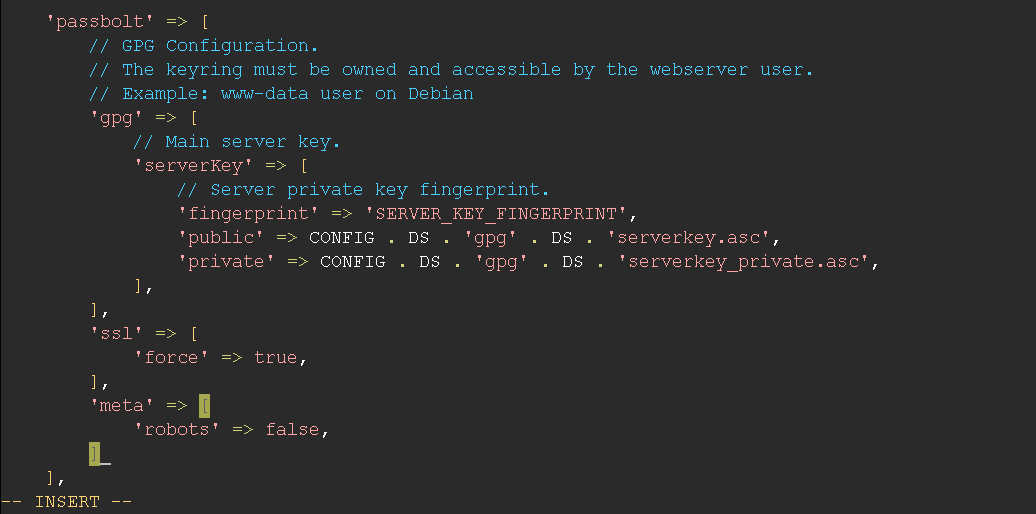
Search engine robots
Ensure that the search engine robots are configured to not index the content, if it is not the case, set passbolt.meta.robots to false in /etc/passbolt/passbolt.php
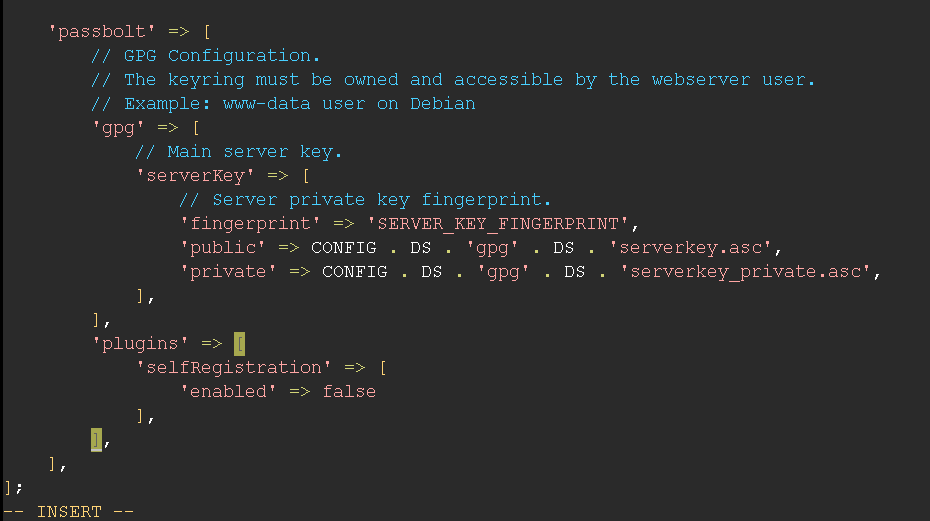
Self Registration Plugin
Enabled by default, it check if the self registration plugin is enabled as expected. You can disable the plugin in /etc/passbolt/passbolt.php through passbolt.plugins.selfRegistration.enabled and set it to false.
Registration Closed
This check is following the self registration plugin. It checks if the open registration is closed and only the admins are allowed to create users or if the self registration plugin is enabled and it has been configured in the user interface through Administration > Self registration. You should be able to see which self registration provider is set.
Deprecated self registration public settings
This check ensure that the self registration public settings are not present in the passbolt configuration file in /etc/passbolt/passbolt.php, if it is still there you may remove the passbolt.registration.public settings.
Host availability
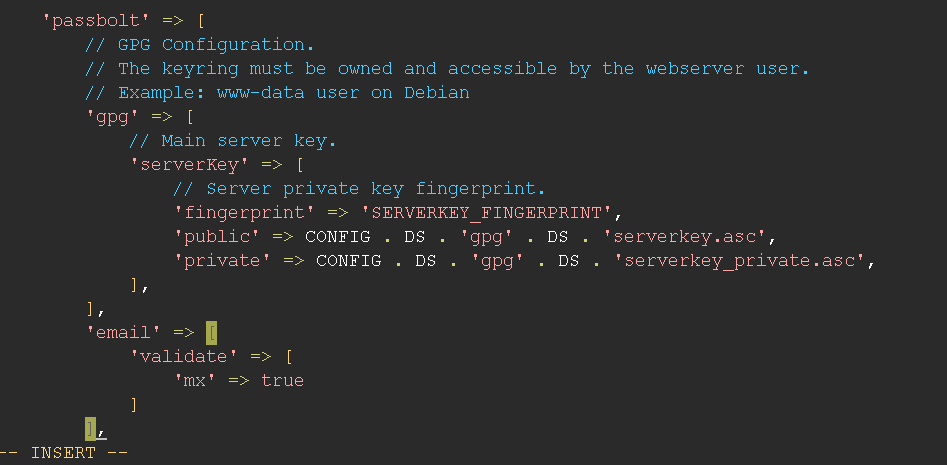
The passbolt server will verify the email domain names. This means that passbolt will query DNS for an MX record associated with the email addresses used. This is disabled by default.
When it is enabled, it won't be possible to proceed to a user creation using a local email address, if you are confident about using trusted email domain addresses, you may want to enable it.
- Set
PASSBOLT_EMAIL_VALIDATE_MXenvironment variable to true if you are on Docker or Helm - Set
passbolt.email.validate.mxto true in /etc/passbolt/passbolt.php
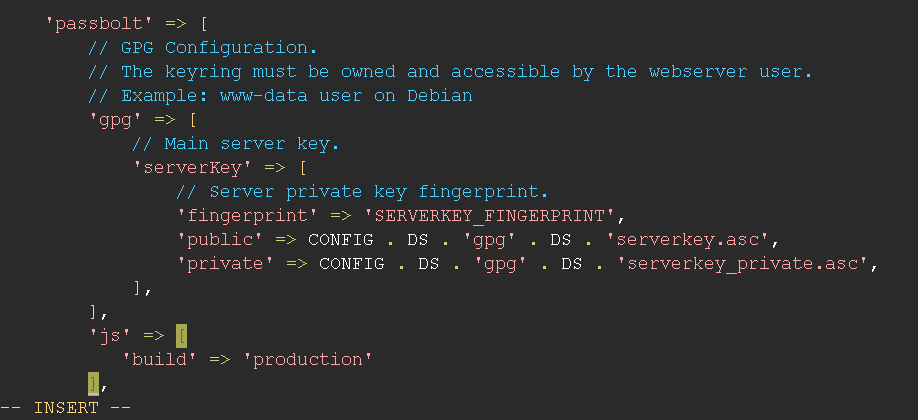
Compiled version of the javascript application
It will ensure that the compiled version of the application is served, you should not face any errors, however if there is any, you should set passbolt.js.build to production in /etc/passbolt/passbolt.php otherwise Passbolt will be slower.
Email notifications
It checks if some email notifications are disabled by the administrator, this just there as a warning. This is usually a good practice to monitor the email notifications.
SMTP Settings
These SMTP settings checks ensure that the configuration is working for sending emails are correctly configured and operational.
SMTP Settings Plugin
Ensure that the SMTP plugin is enabled. It is enabled by default in order to configure the SMTP settings through the user interface in Administration > Email server.
SMTP Settings Configuration
This check helps to ensure that the SMTP settings are coherent. If there is any error, it will be displayed.
SMTP Settings Source
Display which SMTP settings source are used, e.g. through the configuration file in /etc/passbolt/passbolt.php, environment variables if you are on Docker or Helm or through the interface which is the database. It should be using database by default.
SMTP Settings endpoints
It helps to verify that the SMTP plugins endpoints are enabled, this is needed in order to configure the SMTP settings through the user interface, this is enabled by default.
Directory Sync
It verifies that the endpoints for synchronizing user directory configurations are enabled and functioning.
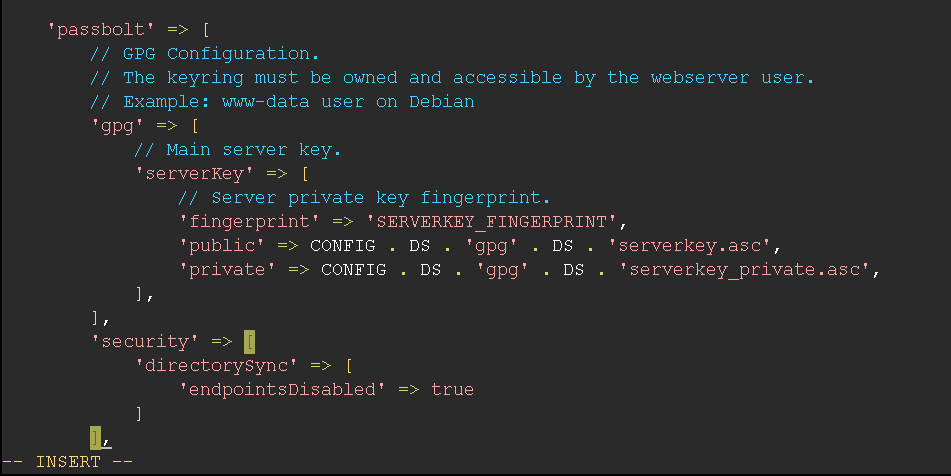
This is needed in order to configure LDAP through the user interface in Administration > Users Directory instead of using /etc/passbolt/ldap.php which is only recommended if you are using multiple LDAP servers to synchronize the trees structure.
If you are not using LDAP with Passbolt, you can disable this plugin through /etc/passbolt/passbolt.php with passbolt.security.directorySync.endpointsDisabled or with the environment variable PASSBOLT_SECURITY_DIRECTORY_SYNC_ENDPOINTS_DISABLED if you are on Docker or Helm.
SSO
This help with the TLS (SSL) certification validation for the Single Sign-On (SSO) instance is enabled and properly configured. There is a few things to consider if you are manually disabling it.
- Disabling the TLS (SSL) verification check can lead to security attacks.
- Attacker can alter the certificate and can perform man-in-the-middle attack.
If you want to fix this, set PASSBOLT_SECURITY_SSO_SSL_VERIFY environment variable to true if you are on Docker or Helm or set passbolt.security.sso.sslVerify to true in /etc/passbolt/passbolt.php.
