Create Resource
A resource is any entry you store in passbolt. Each one carries metadata, such as its name and the address it belongs to, along with one or more encrypted secrets. That secret does not have to be a password. It can be a Time-base One Time Password (TOTP) on its own, a note, custom fields or a pin code, and one resource can hold several of them at once.
Content types you can create
| Content type | What the secret holds | New in |
|---|---|---|
| Password | A password, optionally with a TOTP alongside it | |
| TOTP | A TOTP on its own, with no password attached | 4.4 |
| Custom fields | Key and value pairs, for anything that does not fit the other types | 5.3 |
| Notes | A free text note of up to 50,000 characters | 5.6 |
| Pin code | A numeric code of 4 to 12 digits | 5.12 |
The Create menu only lists a content type when your instance offers it, so your own menu may be shorter. Custom fields, Pin code and Notes need encrypted metadata to be the default content type, and TOTP needs the TOTP content type to be enabled. Administrators control both, see allowed content types and encrypted metadata.
Create a resource
Very little is compulsory. A resource can be saved with nothing but a name, or nothing but a password, and whatever you leave empty can be filled in later by editing the resource. Every procedure on this page fills in each field its content type offers, so you can see what is available; take from them what your own entry needs.
- Login and/or go to the password workspace
- Click the Create button in the top left corner, then choose Password
- You should now see a "Create a resource" dialog
- Fill in a name, a URI, a username and a password
- Press the Create button (or enter on your keyboard)
- Wait until the encryption is done
A resource holds more than one secret if you need it to. The left side of the dialog has an Add secret menu offering Password, TOTP, Custom fields, Note and Pin code. Every secret you add gets its own entry under Secrets, so you can move between them while you fill the dialog in, or remove one with the bin icon. The same menu sits in the Edit a resource dialog, so you can also add a secret to a resource that already exists.
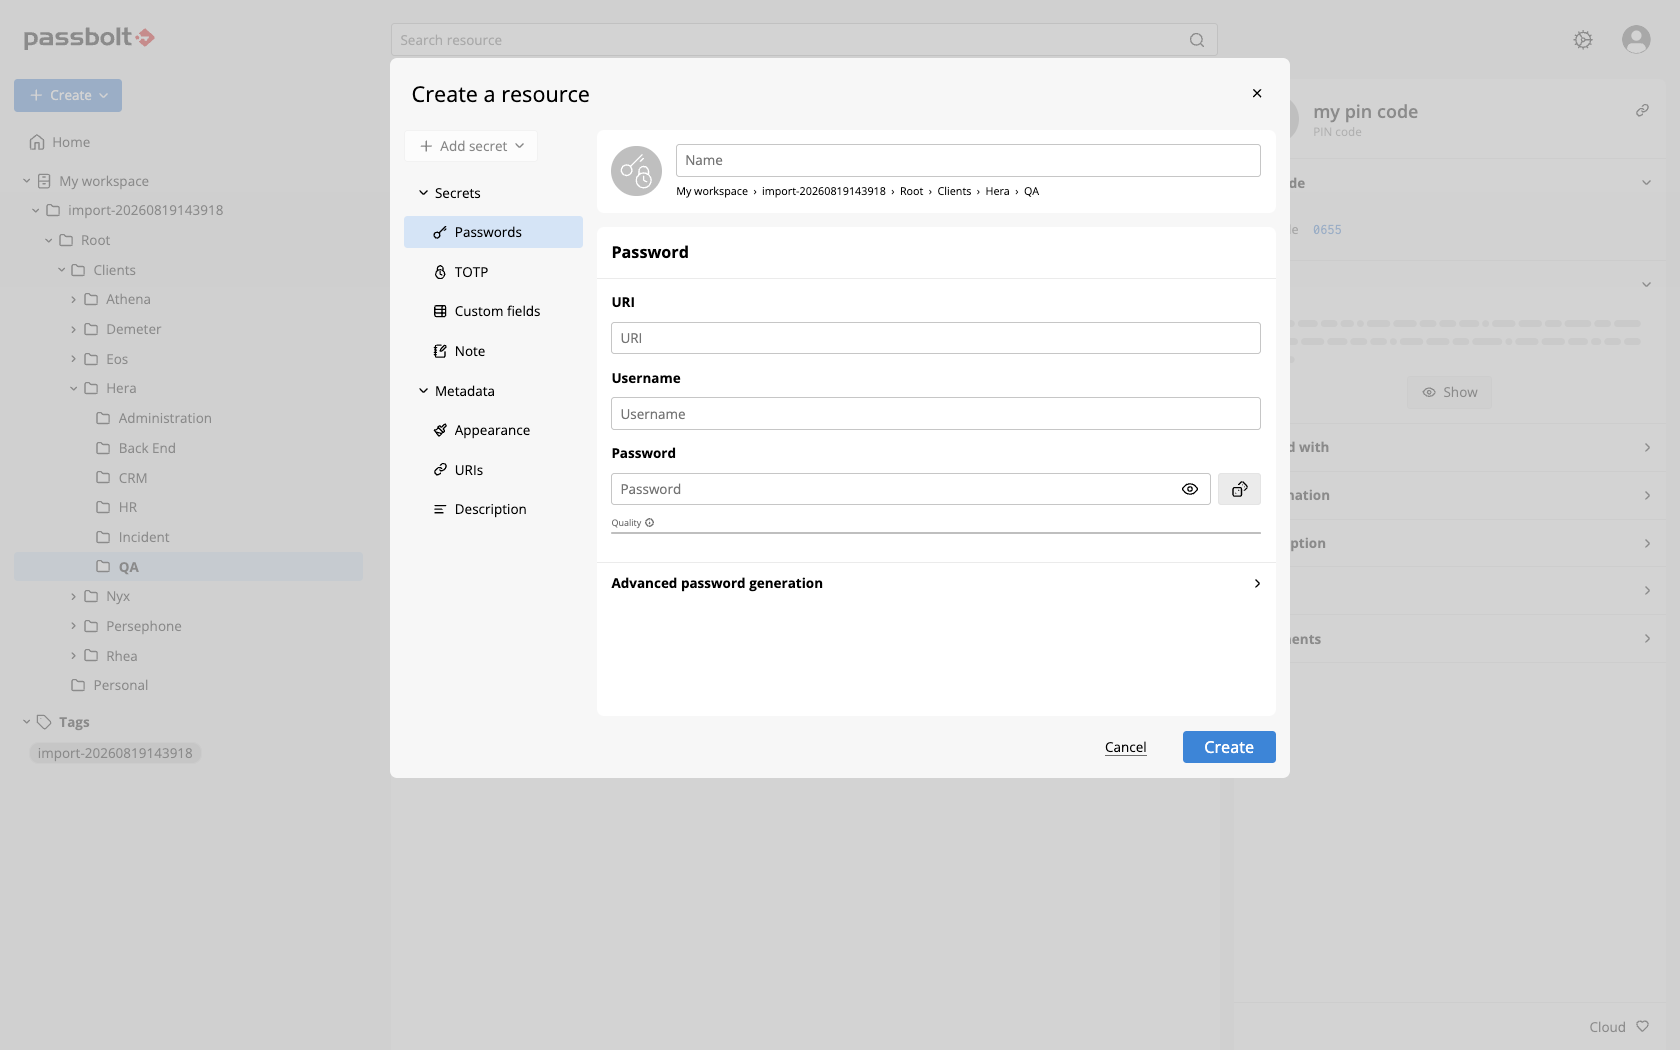
Each kind of secret can be added once per resource. A pin code is the exception to combining: it can only sit alongside a note, so a resource that already holds a password, a TOTP or custom fields does not offer it.
Add a password
- Open the create or edit dialog of the resource
- Type the password in the Password field, or click the dice button beside it to generate one
- Optionally open Advanced password generation to change how the generator builds the secret
- Press the Create button, or Save when editing
Quality below the field rates the password from very weak to very strong once there is something to rate. The information icon beside it gives the entropy in bits.
Advanced password generation
The panel has two tabs, password and passphrase, and opens on whichever one your administrator set as the default generator. Anything you change here applies to this secret only.
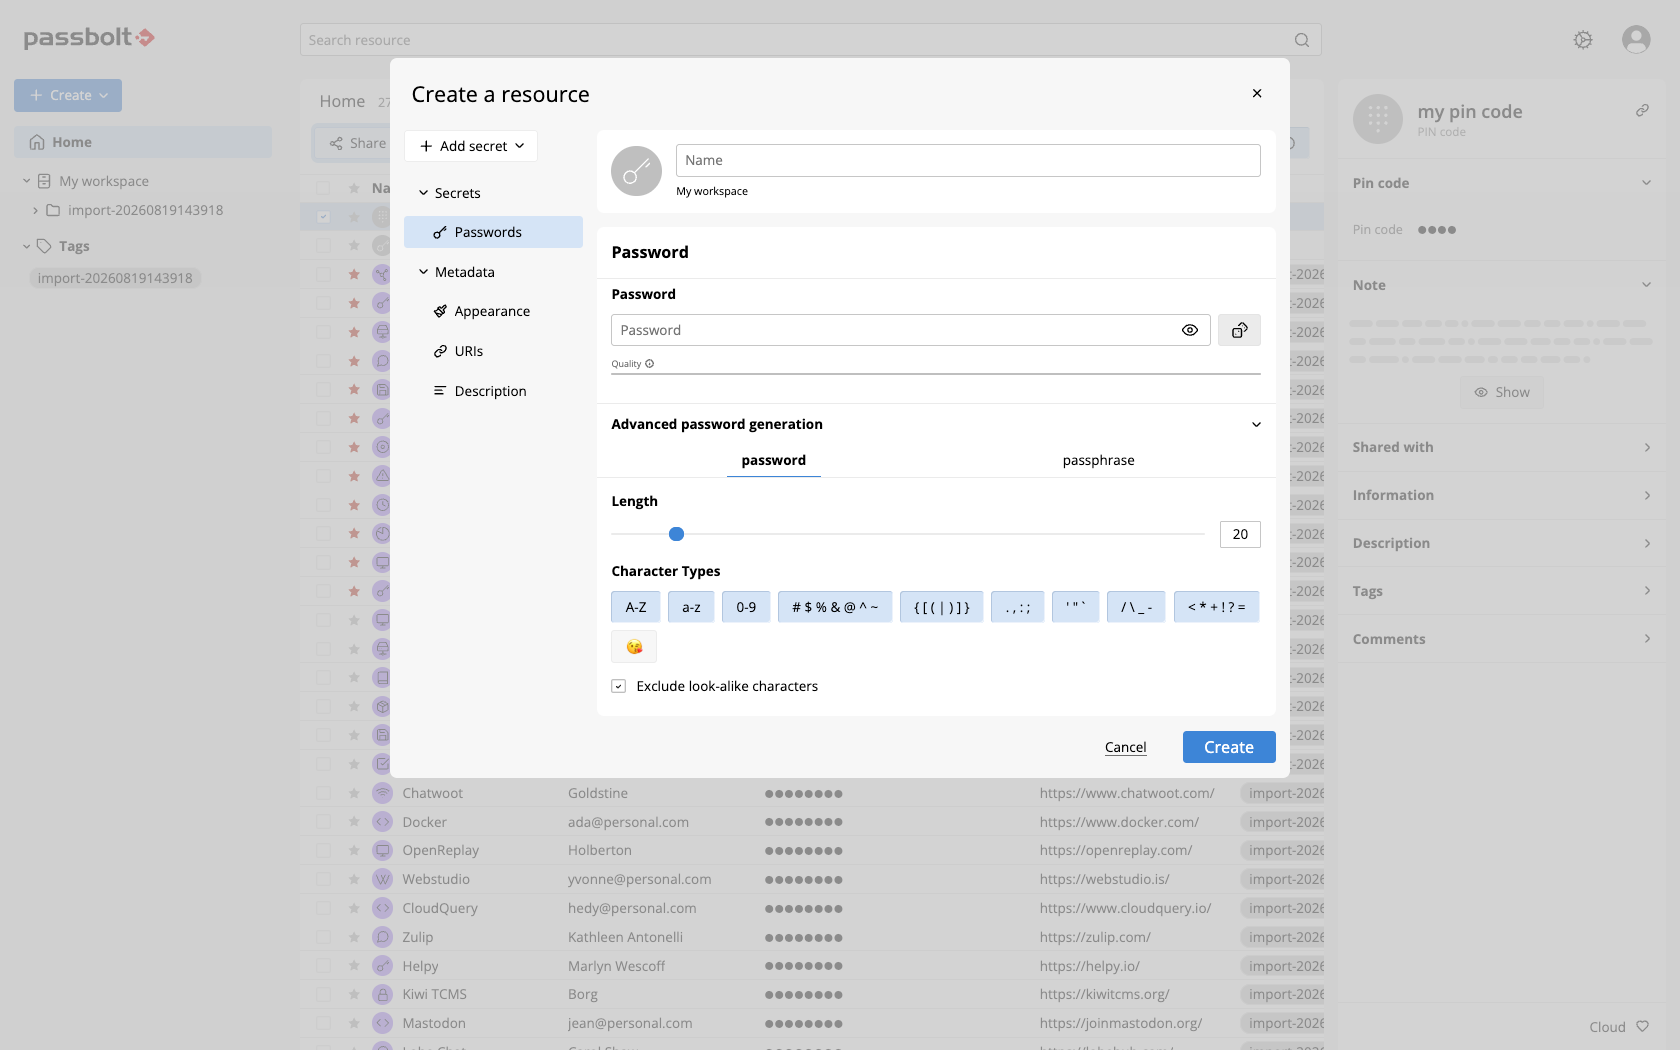
The password tab builds a random string of characters:
- Length: a slider and a number field, from 8 to 128 characters, 18 by default.
- Character Types: a row of toggle buttons, each labelled with the characters it contributes:
A-Z,a-z,0-9,# $ % & @ ^ ~,{ [ ( | ) ] },. , : ;,' " `,/ \ _ -,< * + ! ? =and an emoji button. All are on by default except emoji. - Exclude look-alike characters: leaves out characters that are easily mistaken for one another, such as
l,1andI. On by default.
The passphrase tab builds a sequence of words:
- Number of words: from 4 to 40, 9 by default.
- Words separator: the character placed between the words, a space by default.
- Words case:
lower-case,UPPER-CASEorCamel-Case.
To change these defaults for everyone rather than for one secret, see password policy (Pro and Cloud).
Where an administrator has enabled the external dictionary check, saving a password that is very weak or that appears in a known data breach first opens a Confirm resource creation dialog. Only a hash of the password is sent to the external service, never the password itself.
Add a TOTP
- Open the create or edit dialog of the resource
- Click Add secret, then TOTP
- Paste the secret from your provider into Key (secret), or click Upload a QR code and select a PNG or JPEG screenshot of the provider's QR code
- Optionally open Advanced settings to adjust TOTP expiry (1 to 120 seconds), TOTP length (6 to 8 digits) and Algorithm
- Press the Create button, or Save when editing
The Preview panel on the right shows the current code, so you can check it against your provider before saving.
Advanced settings have to match the settings of your TOTP provider, otherwise the generated codes will not be accepted.
Add a note
- Open the create or edit dialog of the resource
- Click Add secret, then Note
- Type the note in the Content field
- Press the Create button, or Save when editing
A note holds up to 50,000 characters, or 10,000 on a resource using legacy cleartext metadata.
Add custom fields
- Open the create or edit dialog of the resource
- Click Add secret, then Custom fields
- Fill in the label and the value of the first row
- Click Add Row for every additional pair you need
- Press the Create button, or Save when editing
Add a pin code
- Open the create or edit dialog of the resource
- Click Add secret, then Pin code
- Type the code in the Code field, or click the generator button beside it
- Optionally set the length under Advanced pin code generation, from 4 to 12 digits
- Press the Create button, or Save when editing
Add metadata
The Metadata section sits at the bottom of the left panel, below Secrets, and holds the fields that are not secrets. It appears for every content type with encrypted metadata, including the standalone ones below, though a legacy resource may not offer all three.
Appearance
How the resource looks in the list, so you can pick it out at a glance. Since 5.2 it covers two things, Color and Icons, each with its own switch:
- Color: leave Default color switched on to keep the colour passbolt assigns, or switch it off and choose from fourteen swatches. A fifteenth swatch, struck through with a red line, sets no colour at all.
- Icons: leave Default icon switched on to keep the icon for the content type, or switch it off and choose from sixty-nine icons, the same set KeePass uses, so an imported database keeps familiar iconography.
Clicking the icon next to the name opens the same form.
Appearance is metadata rather than a secret: it is stored as part of the resource's metadata, so anyone the resource is shared with sees the colour and icon you pick.
URIs
The addresses the credential belongs to. Since 5.2, a resource can carry more than one, which is useful when the same account is used across several hostnames, such as a staging site alongside production, or a service reachable at both a vanity domain and an internal one.
The first field is the Main URI. Click Add URI to add another, and each one after the first gets a bin icon to remove it. Each address holds up to 1024 characters, and a resource holds up to 20 in total. Add URI stays unavailable until the last field has something in it, so you cannot leave an empty row behind.
Every address counts when passbolt decides whether to suggest a credential: a match on any one of them is enough for the resource to be offered on that page. A few places use the Main URI alone, Copy URI among them, so it is worth putting the address you care about most first.
Description
Free text about the resource, entered in the Content field: what the account is for, who owns it, anything a colleague you share it with needs to know. It holds up to 10,000 characters.
The description is metadata rather than a secret. On a resource with encrypted metadata it is encrypted along with the name and the URIs, but it stays searchable, so it is the wrong place for a second password or a recovery code. Add a Note secret for anything that belongs behind the encryption.
Create a standalone TOTP
A standalone TOTP is a resource whose only secret is the one-time password, with no password attached.
- Login and/or go to the password workspace
- Click the Create button in the top left corner, then choose TOTP
- Fill in a name and a URI
- Fill in Key (secret), or upload the provider's QR code, as described in add a TOTP
- Press the Create button (or enter on your keyboard)
- Wait until the encryption is done
The URI field of the TOTP form writes to the same address as the URIs metadata section. The TOTP form shows it only while the resource has no password, so on a resource holding both, edit the address under URIs instead.
Create a standalone note
- Login and/or go to the password workspace
- Click the Create button in the top left corner, then choose Notes
- Fill in a name
- Type the note in the Content field
- Press the Create button (or enter on your keyboard)
- Wait until the encryption is done
Create standalone custom fields
Use this for anything that does not fit the other content types, such as continuous integration variables or the settings of a piece of equipment.
- Login and/or go to the password workspace
- Click the Create button in the top left corner, then choose Custom fields
- Fill in a name
- Fill in the label and the value of the first row, then click Add Row for every additional pair
- Press the Create button (or enter on your keyboard)
- Wait until the encryption is done
Create a standalone pin code
- Login and/or go to the password workspace
- Click the Create button in the top left corner, then choose Pin code
- Fill in a name
- Type the code in the Code field, or click the generator button beside it
- Press the Create button (or enter on your keyboard)
- Wait until the encryption is done
Advanced pin code generation sets the length, from 4 to 12 digits.
Legacy resources with cleartext metadata
While an instance is migrating to encrypted metadata, administrators can allow both formats. The Create menu then also lists Other, which opens a dialog with two tabs: Resources with encrypted metadata and Legacy resources. The legacy tab offers Password (legacy) and TOTP (legacy), both marked "with cleartext metadata".
Use the legacy tab only while migrating. See allowed content types for what each format protects.
Pro Tips
- You can switch through the fields using the tab button on your keyboard
- You can press on the eye button to see your password in clear
- When Passbolt detects a password field in a Website form or a Mobile application, Passbolt will give you the ability to generate a password on-demand and save it in your account