Migrate to a new Docker Container
Pre-requisites
For this tutorial, you will need:
- passbolt installed on an old server
- A new server with Docker
Backup the existing data
Prior to the migration you will need to backup the existing passbolt instance data. Please refer to the official backup documentations.
Depending on your TLS (SSL) configuration you might need to copy the certificate and key from the existing instance.
Don't delete the existing instance yet!
Prepare the new server
Create a fresh new passbolt instance on Docker following this documentation.
Migrate the data
Stop running containers
At this step, you should have a running empty passbolt instance running on your server. We will now stop it and delete the database volume.
Both commands below delete named volumes and destroy the database data they hold: -v on docker compose down, and docker volume rm. Check that you are targeting the empty instance you have just created, not a populated production stack.
If you have chosen the docker compose install, you just have to delete the volumes you created with this command:
docker compose -f docker-compose-pro.yaml down -v
If you have chosen to run docker containers, stop them and delete the database volume:
docker stop passbolt-container-name
docker stop passbolt-database-name
docker volume rm passbolt-database-volume-name
Of course, replace containers and volume name with your own!
Restore your database
According to MariaDB documentation on Docker Hub:
When a container is started for the first time, a new database with the specified name will be created and initialized with the provided configuration variables.
Furthermore, it will execute files with extensions .sh, .sql, .sql.gz, and .sql.xz that are found in /docker-entrypoint-initdb.d. Files will be executed in alphabetical order. .sh files without file execute permission are sourced rather than executed.
You can easily populate your mariadb services by mounting a SQL dump into that directory and provide custom images with contributed data. SQL files will be imported by default to the database specified by the MARIADB_DATABASE / MYSQL_DATABASE variable.
This means you just have to mount your database backup file on /docker-entrypoint-initdb.d folder of the database container.
Edit your docker-compose-pro.yaml file and add a volume mount in the db service:
volumes:
- database_volume:/var/lib/mysql
- ./path/to/your/database/dump.sql:/docker-entrypoint-initdb.d/dump.sql
Set your GPG server keys fingerprint and email
In the scope of a migration to docker, you need to add 2 environment variables to the passbolt service related to the GPG server keys fingerprint and email address.
Get them from your backed up keys:
$ gpg --show-keys /path/to/serverkey.asc
pub   rsa3072 2022-01-20 [SC]
    43F978AFF88B53F5ABBD12C87D5E40A4C43926ED
uid                      Passbolt default user <[email protected]>
sub   rsa3072 2022-01-20 [E]
In the above output, fingerprint is 43F978AFF88B53F5ABBD12C87D5E40A4C43926ED and email address is [email protected].
Add the environment variables in your docker-compose-pro.yaml file (replace with your own values):
services:
passbolt:
environment:
PASSBOLT_GPG_SERVER_KEY_FINGERPRINT: "43F978AFF88B53F5ABBD12C87D5E40A4C43926ED"
Start your containers
You can now start your database and passbolt containers, your database will be restored at the database container start.
Restore GPG server keys
Copy the GPG you backed up in your container:
docker cp serverkey_private.asc your-passbolt-container:/etc/passbolt/gpg/serverkey_private.asc
docker cp serverkey.asc your-passbolt-container:/etc/passbolt/gpg/serverkey.asc
Then set correct rights:
docker exec -it your-passbolt-container chown www-data:www-data /etc/passbolt/gpg/serverkey.asc
docker exec -it your-passbolt-container chown www-data:www-data /etc/passbolt/gpg/serverkey_private.asc
docker exec -it your-passbolt-container chmod 440 /etc/passbolt/gpg/serverkey.asc
docker exec -it your-passbolt-container chmod 440 /etc/passbolt/gpg/serverkey_private.asc
Restart the passbolt container
The container entrypoint imports the server keys into the web server user keyring only when the container starts. Copying the key files into a running container does not update the keyring: until you restart it, passbolt keeps using the key it generated at first start.
Restart the passbolt container so the entrypoint imports your restored keys:
docker compose -f docker-compose-pro.yaml restart passbolt
If you have chosen to run docker containers:
docker restart your-passbolt-container
The copied key files survive the restart: the official docker compose file mounts /etc/passbolt/gpg on a named volume.
After the restart the keyring contains two keys: the one generated at first start and your restored key. The PASSBOLT_GPG_SERVER_KEY_FINGERPRINT environment variable you set earlier tells passbolt which one to use, so make sure it is set to the fingerprint of your restored key.
You can verify that passbolt uses the restored key:
docker exec -it your-passbolt-container su -c "/usr/share/php/passbolt/bin/cake passbolt healthcheck --gpg" -s /bin/bash www-data
If you have lost the old server keys
You can still migrate. Your users' passwords are encrypted with each user's own key, not the server key, so they are not lost with it. The server key is used to authenticate the server towards the users, and passbolt already generated a new one when the fresh container first started, so keep that one instead of restoring a backup:
- Skip the fingerprint,
docker cpand restart steps above. - Get the fingerprint of the generated key:
docker compose -f docker-compose-pro.yaml exec passbolt su -c "gpg --list-keys" -s /bin/bash www-data
- Set
PASSBOLT_GPG_SERVER_KEY_FINGERPRINTto that fingerprint in your docker compose file, as described in the fingerprint section above, then restart the passbolt container to apply it.
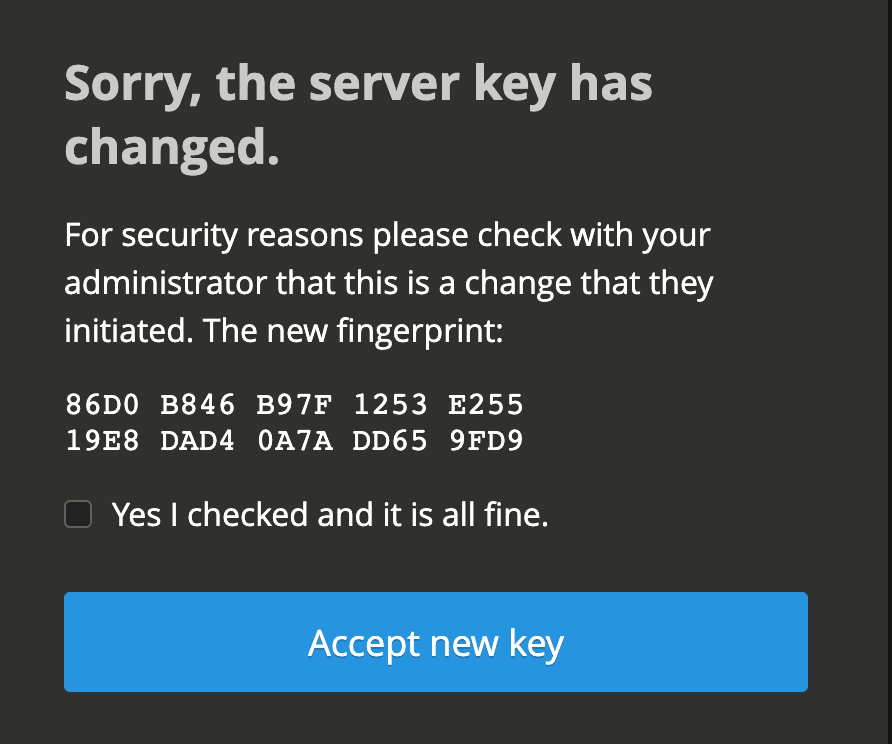
After navigating with your web browser to the passbolt interface you should see a pop-up telling you that the serverKey changed. This is expected and all of your users will see this warning. It needs to be accepted to go further.
If you are using E2EE metadata, after the rotation, if you add new users, you will need to manually share the metadataKey with them every time in Manage Users & Groups once they perform the user registration. We don't want that, navigate to Organisation Settings > Metadata Key, scroll down and use the "Rotate key" button to avoid that.
The server GPG keys rotation page describes the key replacement process in more detail.
That's it
If your passbolt URL has changed, you will have to proceed to the same process than when setting up the browser extension on a new browser aka, follow the account recovery process.